Music Band Stickers in Australia (2026)
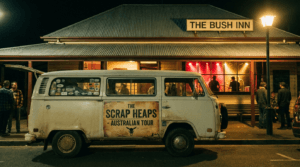
Picture this: it’s a Tuesday night in a sticky-floored pub somewhere in Fitzroy or Fortitude Valley. The lights are low, the monitors are buzzing, and
Published by FastStickers Team
In the world of custom stickers and labels, few options offer the professional finish and design flexibility of die cut stickers. Whether you’re a business looking to create eye-catching promotional materials, an artist wanting to showcase your creativity, or an individual seeking personalized stickers for your projects, die cut stickers provide the perfect solution for standing out from the crowd.
At FastStickers, we’ve seen the incredible impact that well-designed die cut stickers can have on brands, events, and personal projects. In this comprehensive guide, we’ll explore everything you need to know about die cut stickers – from what they are and how they’re made, to design best practices and creative applications.
Die cut stickers are custom-shaped adhesive labels that are precisely cut to follow the exact contours of your design, rather than being confined to standard geometric shapes like circles, squares, or rectangles. The term “die cutting” refers to the manufacturing process where a sharp steel blade (called a die) is used to cut through the sticker material, creating clean, precise edges that match your artwork perfectly.
Unlike traditional stickers that come with excess material around your design, die cut stickers eliminate unnecessary white space or borders, creating a sleek, professional appearance that makes your design the star of the show.
Understanding the die cutting process can help you appreciate the precision and craftsmanship that goes into every die cut sticker:
Your artwork is prepared with a cutting path that defines exactly where the die will cut. This path follows the contours of your design, ensuring every detail is preserved.
The appropriate sticker material is chosen based on your intended use – whether that’s indoor/outdoor application, durability requirements, or finish preferences.
Your design is printed onto the chosen material using high-quality digital or offset printing techniques, ensuring vibrant colors and sharp details.
A protective laminate layer can be applied to enhance durability and add special finishes like matte, gloss, or UV protection.
The printed material is fed through a die cutting machine where a custom-made steel rule die cuts through the material with precision, following your design’s outline exactly.
Excess material is removed (weeded), and the finished stickers are either provided on a backing sheet for easy application or individually cut for immediate use.
Vinyl Stickers
Paper Stickers
Clear/Transparent Materials
Specialty Materials
Permanent Adhesive
Removable Adhesive
Low-Tack Adhesive
1. Vector Graphics Preferred
Use vector-based artwork when possible (AI, EPS, PDF formats) to ensure crisp edges and scalability without quality loss.
2. Cutting Path Requirements
3. Color Considerations
4. Text Readability
Bleed and Safe Areas
While die cut stickers don’t require traditional bleed, ensure important elements are positioned safely within your design boundaries.
Layer Management
Organize your design with clear layers for artwork, cutting paths, and any special effects or finishes.
Size Optimization
Consider your sticker’s final application when determining size – what works on a laptop might not work on a car bumper.
Brand Promotion
Retail Applications
Art and Expression
Events and Celebrations
Automotive
Electronics and Tech
Clean the Surface
Remove all dirt, oil, wax, and debris from the application surface. Use isopropyl alcohol for best results.
Temperature Considerations
Apply stickers in moderate temperatures (65-75°F) for optimal adhesive performance.
Surface Texture
Consider surface texture – smooth surfaces provide better adhesion than heavily textured ones.
1. Position Carefully
Once a permanent sticker contacts the surface, repositioning becomes difficult or impossible.
2. Apply Pressure
Use a squeegee or your fingers to apply firm, even pressure from the center outward to eliminate air bubbles.
3. Remove Air Bubbles
Small bubbles can often be worked out toward the edges. Larger bubbles may require pricking with a fine needle.
4. Allow Curing Time
Full adhesive strength develops over 24-48 hours, so avoid stress on the sticker during this period.
Material Quality
Higher-grade materials resist fading, cracking, and peeling longer than economy options.
UV Resistance
UV-stable inks and materials prevent color fading in outdoor applications.
Adhesive Selection
Choosing the right adhesive for your application ensures proper bonding without premature failure.
Environmental Conditions
Exposure to extreme temperatures, moisture, chemicals, and abrasion affects lifespan.
Print Resolution
Look for sharp, vibrant printing without visible dot patterns or color banding.
Edge Quality
Clean, precise cutting without jagged edges, incomplete cuts, or material tearing.
Color Consistency
Uniform colors across all stickers in a batch, with good color matching to your original design.
Adhesive Performance
Proper adhesion without air bubbles, lifting edges, or premature failure.
Quantity
Larger quantities typically offer better per-unit pricing due to setup cost distribution.
Size and Complexity
Larger stickers and more complex cutting paths increase material usage and production time.
Material Selection
Premium materials like specialty vinyls cost more than standard paper options.
Additional Services
Lamination, special finishes, and rush production add to base costs.
Order Planning
Plan your sticker needs in advance to take advantage of bulk pricing and avoid rush fees.
Design Efficiency
Optimize your design for efficient material usage and cutting to reduce waste costs.
Material Selection
Choose materials appropriate for your application – don’t overpay for outdoor durability if you need indoor-only stickers.
Over-Complexity
Avoiding extremely intricate designs that may not cut or weed properly.
Size Mismatching
Ensuring your design works effectively at your intended final size.
Poor File Preparation
Providing high-resolution, properly formatted files with clear cutting paths.
Surface Contamination
Failing to properly clean surfaces before application leads to poor adhesion.
Incorrect Timing
Applying stickers in poor weather conditions or wrong temperatures.
Rushed Installation
Taking time for proper positioning and pressure application prevents future problems.
When selecting a sticker manufacturer for your die cut sticker project, consider these essential factors:
Experience and Expertise
Look for manufacturers with proven experience in die cutting and a portfolio of successful projects similar to yours.
Quality Standards
Inquire about quality control processes, material sourcing, and satisfaction guarantees.
Production Capabilities
Ensure they can handle your project size, timeline, and any special requirements.
Customer Support
Responsive communication and helpful guidance throughout the process are invaluable.
At FastStickers, we specialize in delivering lightning-fast, high-quality die cut stickers that exceed expectations. Here’s what sets us apart:
Die cut stickers represent one of the most versatile and impactful ways to bring your designs to life. Whether you’re building brand recognition, promoting an event, or simply expressing your creativity, the precision and professional appearance of die cut stickers make them an excellent choice for any application.
The key to successful die cut sticker projects lies in thoughtful design, appropriate material selection, and working with experienced manufacturers who understand the nuances of the process. By following the guidelines and best practices outlined in this guide, you’ll be well-equipped to create die cut stickers that not only look amazing but also perform reliably in their intended applications.
Remember, great die cut stickers start with great planning. Take time to consider your specific needs, audience, and application requirements. When you’re ready to move forward with your project, the team at FastStickers is here to help you achieve outstanding results with our lightning-fast service and unwavering commitment to quality.
Ready to get started? Contact FastStickers today to discuss your die cut sticker project and discover how our expertise can bring your vision to life with speed, precision, and exceptional quality.
For more information about our die cut sticker services and to request a quote for your project, visit faststickers.com.au or contact our team directly. We’re here to help you create stickers that make a lasting impression.
Picture this: it’s a Tuesday night in a sticky-floored pub somewhere in Fitzroy or Fortitude Valley. The lights are low, the monitors are buzzing, and

Picture this: you’ve spent weeks planning a birthday party. The cake is ordered, the guests are invited, and the venue is booked. But when you
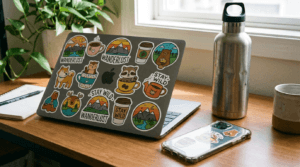
Custom vinyl stickers in use on various business products and packaging. Bright, diverse, with clean branding. Vinyl stickers have become an unexpectedly powerful asset in
Picture this: You’ve just launched your handmade candle brand. The logo is perfect. The packaging is sorted — kraft boxes, tissue paper, a little hand-tied

Picture this. You’re somewhere outside Broken Hill, South Australia. The red dirt stretches flat and endless to the horizon, the sky above is so vivid