

Custom Stickers Melbourne
Custom Stickers Melbourne: The Complete 2026 Guide for Victorian Businesses Picture this: it’s a Thursday afternoon in a Brunswick café. The new logo finally landed
It usually starts the same way. A business owner orders a batch of stickers for their ute doors, their wheelie bins, or the front window of their shopfront. They look sharp on day one. Then two weeks of Australian sun, a bit of rain, and the daily grind of handling later, the corners start to curl. A month on, they’re peeling like old paint, or they’ve vanished entirely, leaving behind a ghostly outline and a sticky residue nobody has time to scrub off.
If that scenario sounds familiar, you’re not alone — and it’s not really about bad luck or a faulty batch. It’s almost always about adhesive mismatch. Before we go any further, let’s clear up the single most important thing in this entire guide, because it trips up a lot of people searching for a fix: “high tack” in this guide refers to high-tack adhesive stickers and labels — not silicone sealant, liquid nails, or construction adhesive. If you landed here expecting a gap-filling compound for skirting boards, this isn’t that. This is about a specific category of pressure-sensitive adhesive — the sticky layer on the back of a label or decal — engineered to grip hard and hold permanently, even in conditions that would see a standard sticker give up within weeks.
That distinction matters more in Australia than almost anywhere else. We deal with some of the most extreme UV exposure on the planet, baking summer heat that turns metal and dark plastic into a frying pan, humidity swings up and down the coast, and salt-laden air in every port town and seaside suburb from Hastings to Williamstown. Ordinary adhesives that perform fine in milder climates — think the UK, parts of Europe, or even temperate US states — simply aren’t built for what an Australian summer throws at them. If you’re printing stickers or labels for anything that lives outdoors, on rough surfaces, or on curved panels, the adhesive you choose isn’t a minor technical detail. It’s the difference between a label that lasts years and one you’ll be reprinting every season.
This guide is here to walk you through the full picture: what “high tack” actually means, why standard stickers fail on brick, concrete, and curved surfaces, how to apply high tack stickers properly for maximum durability, how to remove them without wrecking the surface underneath, and where Australian businesses are putting this product to work right now. We’ll also point you toward Fast Stickers’ High Tack Stickers product line throughout, because after 15+ years printing stickers and labels for Australian tradies, fleets, and businesses, we’ve built this product specifically to solve the problems this guide describes. If you want to dig further into related topics once you’re done here, our blog has plenty more practical, no-nonsense guides like this one.
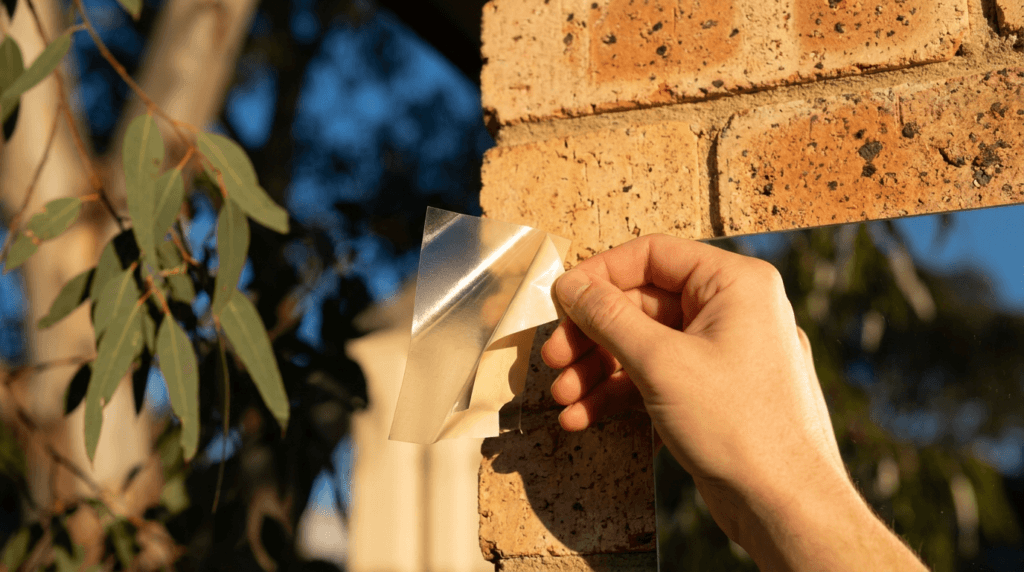
So what exactly makes a sticker “high tack” — and how is it different from the standard stickers most people are used to?
Let’s start with the word itself, because “tack” gets thrown around loosely in both trade and marketing contexts. In adhesive science, tack is the immediate grab an adhesive has on contact — the stickiness you feel the instant you press a label down, before it’s had any time to properly bond or cure. Every pressure-sensitive adhesive has some tack, but high tack refers to a more aggressive, higher-grab formulation, purpose-built for permanent adhesion to surfaces that are difficult, textured, or hostile to ordinary stickers.
This is a completely different category from sealants and construction adhesives. Silicone, liquid nails, gap-filling compounds — these are chemically distinct products designed to bond two solid materials together, fill voids, or create a flexible, waterproof seal in joints and gaps. They cure over hours or days through a chemical reaction, and they’re applied with a caulking gun, not peeled off a backing sheet. High tack stickers, by contrast, are pressure-sensitive adhesive products — meaning the adhesive is already fully formed on the back of the label, and all it needs is firm pressure to activate its bond. No mixing, no curing chemistry, no gap-filling. It’s a decal, label, or sign, just engineered with a tougher adhesive layer.
Here’s a simple way to frame the decision:
And at the complete opposite end of that spectrum sits Fast Stickers’ removable stickers — deliberately low-tack, designed to come off cleanly without residue for short campaigns, seasonal promotions, or rental properties. Seeing all three options side by side makes the logic obvious: adhesive strength isn’t a “better or worse” scale, it’s a “right tool for the surface and the timeframe” decision.
So how do you know which bucket you’re in? A few signals reliably point toward needing high tack:
If any of those apply, you’re squarely in heavy duty labels and heavy duty stickers territory, not standard sticker territory. Think of high tack vinyl as the trade-grade option — the one your business reaches for when a custom label absolutely has to survive the environment it’s being put into, not just look good for the first fortnight.
Is high tack the same as a sealant or glue? No. It’s worth repeating plainly, because the search term causes genuine confusion: high tack describes a strong, permanent pressure-sensitive adhesive sticker or label. It is not silicone, it is not liquid nails, and it is not a gap-filling construction adhesive. Different category, different chemistry, different job entirely.
Understanding what high tack is explains half the story. The other half is understanding exactly why the ordinary stickers most people default to keep failing in the first place — and that’s where the real “aha” moment of this guide happens.
Here’s the frustrating truth: it’s rarely the sticker’s fault in isolation — it’s a mismatch between the adhesive and the surface it’s been asked to bond to. To understand why, it helps to think about what’s actually happening at a microscopic level the moment a sticker is pressed onto a wall, bin, or panel.
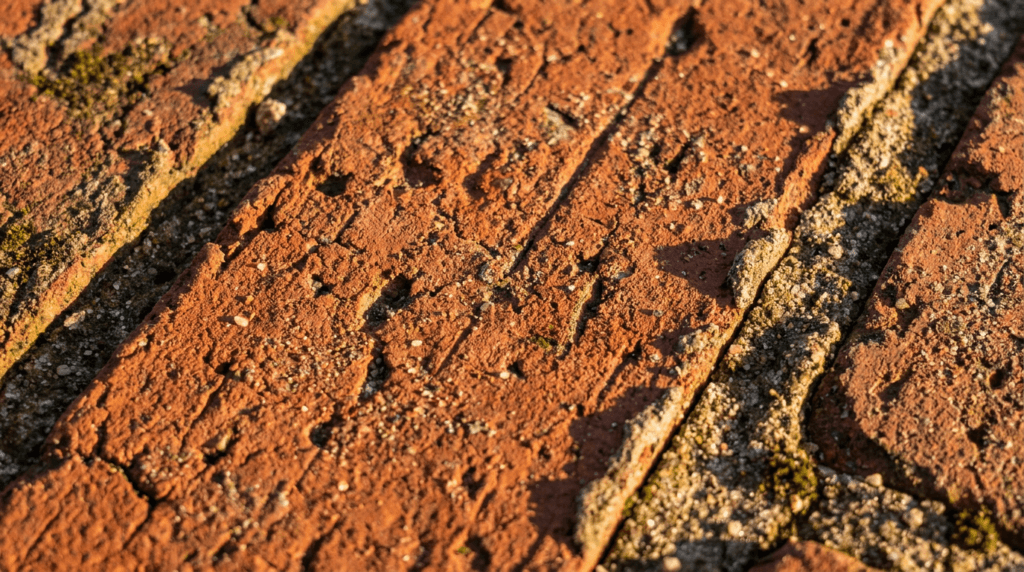
Take a brick wall, a rendered surface, or raw concrete. To the naked eye it might look relatively flat, but zoom in and you’re looking at a landscape of peaks, valleys, pores, and irregularities. For an adhesive to bond well, it needs to physically flow into and fill that irregular surface profile — a process adhesive scientists call “wetting out.” A standard, lower-tack adhesive simply doesn’t have the aggressive initial grab or flow characteristics to fully wet out a surface like that. The result is microscopic air gaps and incomplete contact, especially at corners and edges — exactly where peeling starts.
Then there’s a second, equally common failure mode: low surface energy (LSE) plastics. If you’ve ever tried to stick a label on a wheelie bin, a plastic crate, or certain automotive trim and watched it fall off within days, you’ve met this problem firsthand. Polyethylene and polypropylene — two of the most common plastics in exactly these applications — have a surface energy low enough that most adhesives struggle to bond to them at all. According to 3M’s technical guide on categorising surface energy, materials with a surface energy below roughly 36 dynes/cm are considered low surface energy and are genuinely difficult to bond — and polyolefin plastics like polyethylene and polypropylene sit right in that difficult zone. It’s not that the sticker is defective; it’s that the plastic itself is chemically reluctant to let anything stick to it for long.
Now layer Australia’s climate on top of both of these problems, and you can see why adhesive choice matters so much more here than in gentler climates. According to the Bureau of Meteorology’s average UV Index data, most of the country sits in the “extreme” category — 11 or above — through summer months. Extreme UV doesn’t just fade colours; it breaks down the polymer chains in adhesives and face-stock over time, causing them to become brittle, shrink, or lose their bond strength. Combine that with surface temperatures on dark metal or plastic that can comfortably exceed air temperature by 20-30 degrees on a summer day, plus the humidity and salt-air corrosion found along Australia’s enormous coastline, and you’ve got a genuine stress test that marginal adhesives simply aren’t built to pass.
“Materials with a surface energy below 36 dynes/cm are considered low surface energy and are very difficult to bond.” — 3M, Categorizing Surface Energy
This is precisely the gap high tack adhesives are formulated to close. They’re designed with a more aggressive initial grab so they bite into textured surfaces instead of bridging over the gaps, better conformability so they can flex into porous or irregular profiles, and formulations built to resist the softening and breakdown that UV and heat cause in lesser adhesives over time. That’s the whole premise behind waterproof stickers, weatherproof stickers, and water resistant labels as a product category — they’re not marketing buzzwords, they’re a direct engineering response to the exact failure modes described above. As always, specific durability, UV-resistance, and lifespan figures should be confirmed against Fast Stickers’ current material specification sheets rather than general industry claims, since formulations and performance can vary by product line.
We’ve seen this play out in real Australian conditions too — our work on custom stickers in Hastings, a coastal and marine-industrial area, speaks directly to this challenge, where salt air and constant sun exposure make adhesive choice a genuinely practical, not theoretical, concern.
Flat-but-difficult surfaces are only half the battle, though. There’s a whole separate category of failure that happens the moment you introduce a curve — and it’s one of the most common reasons businesses come to us after a sticker job has gone wrong.
If you’ve ever applied a sticker to a pipe, a plastic bin lid, a bottle, or the curved panel of a ute and watched the edge peel up like a tiny flag catching the wind, you’ve witnessed what the industry calls flagging. It’s one of the most recognisable sticker failures there is — and it almost always starts at the point of tightest curvature, where the mechanical stress on the adhesive is highest.
Here’s why curves are so much harder to deal with than flat surfaces. When you apply any vinyl material to a curved substrate, you’re essentially forcing a naturally flat material to hold a shape it doesn’t want to hold. The material’s own structural memory is constantly trying to pull itself back flat, which puts continuous tension on the adhesive bond at the edges and corners. A standard adhesive might hold that tension for a while, but over time — especially with daily heat cycling, where the surface expands in the sun and contracts overnight — the adhesive gradually loses that fight. First the very corner lifts, then it creeps inward, and eventually you’ve got a sticker hanging on by a thread, flapping in the breeze.
Solving this isn’t just about adhesive strength on its own — it’s about pairing the right adhesive with the right face-stock. A rigid vinyl simply won’t conform to a compound curve no matter how aggressive the glue underneath is; it will always want to spring back. A conformable vinyl face-stock paired with a high-tack adhesive, on the other hand, is specifically suited to wrapping around curves because the material itself can flex and hold its new shape, while the adhesive underneath has the grab to keep it locked in place through that tension.
If you’re tackling a curved-surface application yourself, a few practical techniques make a real difference:
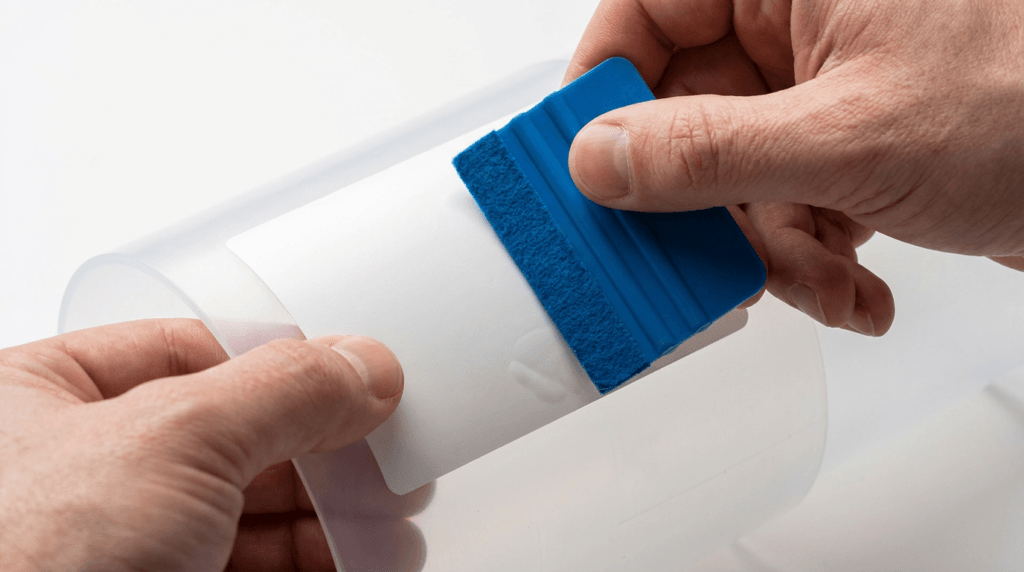
These aren’t hypothetical scenarios — they’re everyday reality for Australian businesses. Think about bin labelling across a commercial property, asset and pipe identification in a warehouse or industrial site, drum and container labelling for anyone handling chemicals or produce, and vehicle branding on bumpers and panels that are rarely, if ever, flat. Our bumper stickers are a direct example of a curved, high-wear, outdoor-exposed application where high tack adhesive genuinely earns its keep — bumpers cop stone chips, car washes, and constant sun, and a standard sticker just won’t survive that gauntlet. For businesses labelling large numbers of curved items — bins across a whole depot, containers on a production line, product packaging — our vinyl sticker rolls make that kind of high-volume, repeat application practical and efficient.
Curved-surface technique, when you break it down, is really just an extension of good general application practice — a bit more deliberate, a bit more hands-on, but built on the same fundamentals. Which brings us neatly to the full picture: what does a correct, maximum-durability high tack sticker application actually look like from start to finish, regardless of whether the surface is flat or curved?
This is the section worth bookmarking, because even the best adhesive in the world will underperform if it’s applied incorrectly. The good news is that getting it right isn’t complicated — it just requires following the sequence properly rather than rushing straight from unboxing to sticking.
Step 1: Surface preparation. This is the step most failures trace back to, and it’s the easiest to fix. Clean the surface thoroughly with isopropyl alcohol or a suitable solvent to strip away dust, oils, wax, and any invisible residue — fingerprints and silicone-based car-detailing products are sneaky culprits here, since they can leave an invisible film that stops adhesive from making proper contact. Let the surface dry completely before moving on. A surface that looks clean to the eye can still carry enough oily residue to compromise the bond, so don’t skip this step even when a surface “looks fine.”
Step 2: Check surface temperature and conditions. Avoid applying in extreme heat, direct baking sun, or cold conditions — both extremes make the vinyl and adhesive behave unpredictably, either becoming too soft and prone to stretching and bubbling, or too stiff and unwilling to conform. Aim for a moderate temperature window and, where possible, apply in shade rather than direct sun to keep the material workable.
Step 3: Respect paint cure time. This is one of the most commonly overlooked steps, and it causes a frustrating, entirely avoidable failure. Freshly painted surfaces — a newly resprayed ute panel, a newly painted shopfront, a repainted bin — need time to properly cure before any sticker goes anywhere near them. As a general industry best practice, allow a minimum of roughly 14 days, with some paints requiring longer depending on the formulation; this guidance reflects commonly cited best practice in the signage and decal industry rather than a single universal standard. The reason is simple but easy to miss: even when paint feels dry to the touch, it can still be off-gassing trapped solvents from underneath as it fully cures. Trap a sticker over the top of that process and those escaping solvents have nowhere to go, often causing bubbling, lifting, or outright adhesive failure weeks later. Always check the specific paint manufacturer’s cure guidance for exact timing, since this can vary meaningfully between paint types.
Step 4: Application technique. Use a peel-and-position method — position the sticker carefully before committing, since high tack adhesives grab fast and don’t forgive a careless first placement. Once positioned, squeegee firmly from the centre outward in overlapping strokes to push air out ahead of the squeegee rather than trapping it in the middle. For curved surfaces, rivets, or wrap-style applications, a heat gun used carefully can make a real difference in helping the vinyl conform smoothly without wrinkling.
Step 5: Post-application care. Resist the urge to wash the surface, flex it, or put it straight back into heavy use for the first 24–48 hours. This window allows the adhesive to fully “set up” and reach its full bond strength — rushing this stage is a bit like driving off before glue has properly set; it might look fine immediately, but you’re undermining the long-term hold.
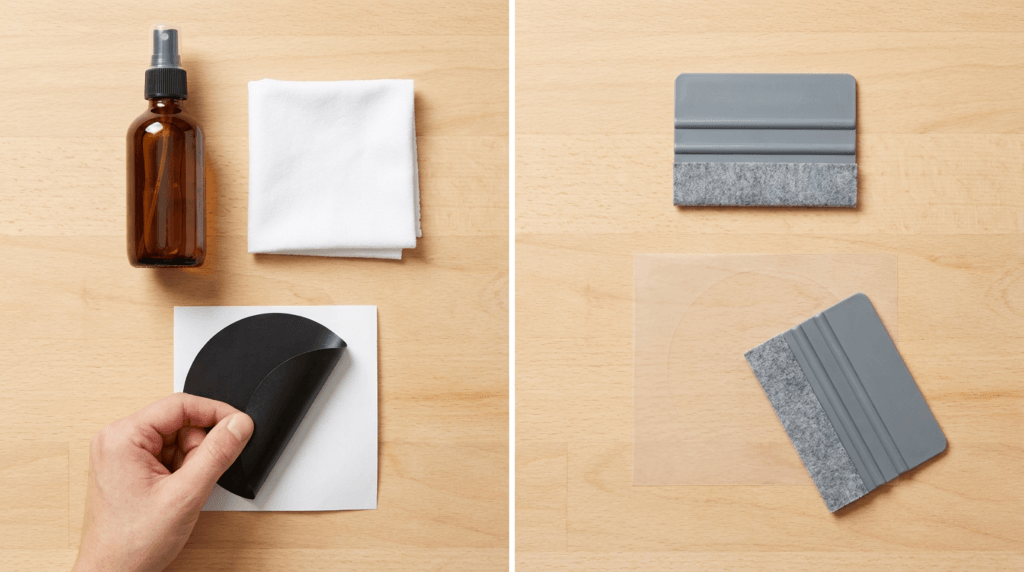
As with the durability figures mentioned earlier, treat the cure times, temperature ranges, and bond-strength timelines above as general best-practice guidance — always confirm specifics against Fast Stickers’ actual product documentation before relying on exact numbers for a critical job. Once you’ve nailed the surface prep and timing, Fast Stickers’ High Tack Stickers are built to make the rest of the process straightforward. And if you’re ready to move from planning to ordering, our quote page is the natural next step once you know exactly what you need.
With the application process locked in, there’s one more question almost every reader eventually asks, usually a year or two down the track: what happens when this sticker — the one specifically engineered to hold on tight — needs to come off?
Let’s be upfront about something most guides gloss over: high tack stickers are designed to be hard to remove. That’s not a flaw, it’s the entire point — a product built for permanence and long-term durability will, by definition, put up a fight when you try to take it off. Removal requires a bit of patience and the right method, not brute force, and understanding that trade-off upfront will save you a scratched panel or a frustrating afternoon.
The single most effective tool for removal is heat. A heat gun or even a household hairdryer, used at a gentle setting and kept moving to avoid scorching the surface, softens the adhesive and makes it considerably easier to peel back slowly without tearing the vinyl or leaving a sticky residue behind. The goal is to warm the adhesive just enough that it loses its grip, not to blast the surface with concentrated heat in one spot.
Different surfaces call for slightly different care:
The honest truth is that the overwhelming majority of surface damage during removal doesn’t come from the sticker itself — it comes from impatience. Forceful peeling, cold scraping, and trying to rip a high tack label off in one motion is almost always what causes scratched paint or marked powder coat, not the adhesive formulation doing something unexpected. Slow down, apply heat, and let the chemistry do the work rather than your elbow grease.
It’s worth sitting with that trade-off for a moment, because it circles back to the entire value proposition of this guide: the exact quality that makes high tack stickers slightly more effort to remove is precisely why they’re the right choice for permanent, outdoor, or safety-critical labelling in the first place. You wouldn’t want a compliance label on heavy machinery or a safety sign on a job site to come off easily in the rain — that resistance to removal is a feature, not a bug, when the application genuinely calls for permanence.
Of course, not every job needs that level of commitment. If you’re reading this and realising your actual need is something temporary — a seasonal promotion, a short-term rental sign, a trial branding run — it’s worth taking a look at Fast Stickers’ removable stickers instead, built specifically for clean, residue-free removal when permanence isn’t the goal. And if you’ve got product-specific questions about either option, our FAQ page covers a lot of the common ground before you commit to an order.
With the full lifecycle now covered — choosing the right product, applying it correctly, and removing it responsibly if the day ever comes — it’s worth zooming out and looking at where this actually plays out across Australian industry, because the use cases say a lot about why this product category exists in the first place.
Theory is useful, but nothing makes the case for high tack adhesive quite like seeing where it’s actually being used, day in and day out, across Australian trades and industries. This isn’t a product built for party favours or short-run promotional giveaways — it’s squarely a trade and B2B solution, which is exactly where the heavy duty stickers and outdoor labels keyword cluster genuinely lives in the real world.
Construction and signage is one of the clearest examples. Site safety signage, compliance labelling, and equipment identification all need to survive months on a dusty, sun-exposed construction site, often applied to rough timber hoarding, painted steel, or textured concrete barriers. A compliance label that peels off halfway through a project isn’t just untidy — depending on what it’s communicating, it can become a genuine safety and liability issue.
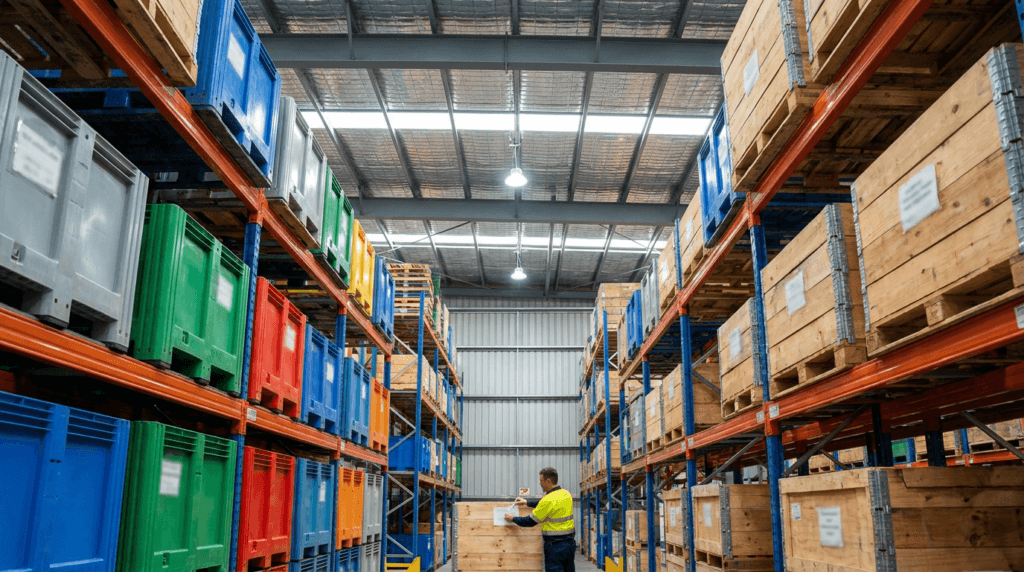
Warehousing and asset labelling is another heavy-use category. Bin labelling, shelf and rack identification, and equipment or asset tags all need to survive constant handling, forklift traffic, dust, and the general wear-and-tear of a working warehouse floor. These labels often get bumped, scraped, and handled dozens of times a day — exactly the scenario where a low-tack adhesive gives up within weeks.
Automotive and fleet branding leans especially hard on high tack vinyl, because vehicles combine almost every challenge covered in this guide at once: curved panels, low surface energy plastic trims on bumpers and mirrors, constant UV exposure, and regular washing. Bumper decals, fleet branding across a whole vehicle livery, and bin or crate labelling on service vehicles all demand an adhesive that can handle curves, weather, and vibration simultaneously.
Marine and outdoor trade businesses face perhaps the toughest combination of all: relentless UV, constant moisture, and corrosive salt air. This is exactly the kind of environment reflected in the work we’ve done on custom stickers in Yarraville and Williamstown — both areas with strong marine, industrial, and heritage waterfront business communities where labelling genuinely has to earn its keep against the elements, not just look good in a showroom. For businesses labelling at scale across many items — whether that’s bins across a logistics depot or products on a manufacturing line — vinyl sticker rolls make high-volume, repeatable application efficient without compromising on adhesive quality.
It’s worth putting a number behind the “why Australia is tougher on labels” argument one more time. The Cancer Council Australia’s UV Index guide confirms Australia’s UV exposure sits among the highest in the world, with extreme ratings of 11 and above common across much of the country through summer. That’s not just a sunburn risk — it’s a materials science problem for anything bonded to an outdoor surface, and it’s exactly why generic, off-the-shelf stickers imported for milder climates so often underperform here.
A few quick answers to questions we hear constantly from business owners weighing up this decision:
Can high tack stickers go on textured brick? Yes — this is precisely the kind of porous, irregular surface high tack adhesive is formulated to handle, where standard adhesives typically fail to wet out properly.
Will high tack stickers survive an Australian summer? That’s the core use case they’re designed around — extreme UV, high surface heat, and humidity are exactly the conditions a high tack formulation is built to resist, though it’s always worth confirming specific performance claims against current product specifications for your exact application.
Do I need high tack for indoor use? Generally, no — if a surface is smooth, clean, and sheltered from weather, a standard adhesive sticker is usually more than sufficient and often more cost-effective. High tack earns its value specifically when the surface or environment is working against you.
Seeing the sheer breadth of industries relying on this product — construction, warehousing, fleet, marine — makes one thing clear: this isn’t a niche product for edge cases, it’s the default right choice the moment a label has a real job to do outdoors or on a difficult surface. Which brings us to tying the whole guide together.

If there’s one thing worth carrying away from this guide, it’s the disambiguation we opened with: high tack means a strong, permanent pressure-sensitive adhesive sticker — not a sealant, not liquid nails, not a construction adhesive. Once that’s clear, everything else in this guide follows logically from it.
We’ve walked through the three core failure points that send ordinary stickers to an early grave: rough and porous surfaces like brick and concrete that standard adhesives can’t fully wet out; curved surfaces that put constant mechanical tension on a bond through flagging; and the genuinely harsh backdrop of Australian conditions — extreme UV, punishing surface heat, humidity, and coastal salt air — that accelerate the breakdown of any adhesive not built for the job. High tack products exist specifically to counter all three at once.
More than that, we’ve covered the full lifecycle of getting this right: choosing the correct product for your surface and environment, preparing and applying it properly with the right technique and timing, and — when the day eventually comes — removing it with patience rather than force. Each stage matters, and skipping any one of them is usually where a perfectly good product ends up underperforming.
For any business dealing with industrial, trade, or bulk labelling needs, it’s worth reframing this entire decision as a long-term investment rather than a one-off purchase. The marginally higher consideration that goes into choosing the right adhesive upfront is almost always cheaper, in time and money, than reprinting and reapplying a batch of failed stickers every six months. You’ve now got the framework to make that call correctly the first time — and Fast Stickers’ High Tack Stickers are built specifically to put that framework into practice.
Need high tack labels for a construction site, a fleet rollout, or a warehouse-wide relabelling job? Fast Stickers can handle bulk and custom orders with the same fast turnaround you’d expect for any job on our books. We print and dispatch most orders in 2–3 business days, back every order with free express shipping Australia-wide, include a free design service if you need help getting your artwork production-ready, and we’ve been doing this for 15+ years as an Australian-owned business operating out of Gippsland, Victoria.
If you’re ready to lock in a bulk or custom order for your business, trade, or fleet, request a quote and our team will get you a fast, straightforward turnaround. If you already know exactly what you need and want to move straight to ordering, you can shop high tack stickers now. And if you’ve still got questions about which product, surface prep approach, or sizing suits your specific job, get in touch with our team before you order — we’d rather help you get it right the first time than sell you the wrong product.
Custom Stickers Melbourne: The Complete 2026 Guide for Victorian Businesses Picture this: it’s a Thursday afternoon in a Brunswick café. The new logo finally landed

Picture this: it’s 9pm on a Tuesday in a spare room in Bendigo, and you’re sitting cross-legged on the floor because the table ran out

Picture this. It’s Friday night in a suburban Australian street — the kind where the smell of melted cheese and wood-fired dough drifts through open

The Complete Australian Guide for Beekeepers and Honey Producers Picture this: it’s a warm December morning in the Yarra Valley. The flow has been extraordinary

Picture this: it’s 6am on the Saturday before Mother’s Day, and a florist in Melbourne’s inner north is already three hours deep into the morning.