
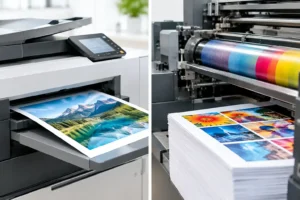
Digital Versus Offset Printing for Your Job
Digital versus offset printing explained for Australian businesses. Compare cost, speed, colour, quantities and the right choice for your next print run.

A sticker can look perfect on screen, then lift at the corners two days after it is applied to a plastic tub, tool case or product bottle. That is where high tack stickers for plastic earn their keep. They use a stronger adhesive designed to grip difficult surfaces, helping your branding, instructions or safety labels stay where they belong.
For Australian businesses, that matters. Plastic is everywhere – from takeaway packaging and cosmetic jars to trade equipment, storage tubs, retail products and point-of-sale displays. But not all plastics accept labels equally. Choosing the right material before printing can save you from wasted stock, rework and a poor first impression.
Plastic may look smooth and clean, but its surface chemistry can make adhesion surprisingly difficult. Some plastics have a low surface energy, which means the adhesive struggles to spread out and form a secure bond. Polypropylene and polyethylene are common examples. You will often find them in squeeze bottles, food containers, buckets, tubs, jerry cans and flexible packaging.
Texture adds another challenge. A rough, moulded or lightly textured surface gives a sticker less contact area than a smooth panel. Curves, edges, oils from handling, dust from a workshop and condensation from chilled products can all reduce how well a label holds.
This is why a standard permanent sticker is not automatically the right answer. It may work brilliantly on a smooth cardboard box, painted metal panel or glass jar, yet struggle on a flexible plastic bottle that is squeezed every day.
High tack stickers use an aggressive adhesive that creates a stronger initial grip and a more durable bond over time. They are a practical option when your sticker needs to adhere to challenging plastic, especially where the item will be handled regularly or exposed to demanding conditions.
They are commonly used for product labels, equipment identification, asset tags, workshop storage, tubs and containers, promotional decals, hard hats, toolboxes and plastic display materials. With the right face stock and print finish, they can also suit outdoor applications where sun, rain and general wear are part of the job.
The key benefit is not simply that the sticker feels extra sticky. It is that the adhesive is better matched to the surface and use case. A label on a bottle of hand wash has different demands from a decal on a ute canopy, and both need a solution that considers the actual environment.
High tack is a smart choice when the plastic is low-energy, textured, curved or likely to receive heavy handling. It is also worth considering if the product will sit in a cool room, travel through freight networks or spend time outdoors.
Before ordering, think through four practical questions:
That last question matters. High tack is designed to stay put. If you need temporary pricing labels, event decals or a sticker that comes off without residue, removable adhesive may be the better fit. For smooth glass surfaces such as shop windows, static cling can make more sense again.
A stronger adhesive gives you more holding power, but it cannot overcome every issue. A sticker applied over dust, mould-release residue, grease or moisture may still fail. Neither will high tack fix a label that is too large for a sharply curved bottle, or one placed across a recessed section where the edges are under constant tension.
Plastic can also contain additives that migrate to the surface over time. This is common with some flexible plastics. In those cases, the best approach is to test a sample on the actual item before committing to a large production run. Leave it in real conditions for several days, including handling, temperature changes and exposure to any products it will encounter.
This small step is especially valuable for food packaging, chemical containers, cosmetics, industrial equipment and any branded item going out to customers. Testing is cheaper than discovering a problem after your labels have been applied.
Even premium stickers need a clean start. Wipe the application area with a suitable cleaner, then allow it to dry fully. Avoid household sprays that can leave behind a film. If the item has come straight from a cold room or has condensation on it, let it return to a dry, workable temperature first.
Apply the sticker slowly from one edge, pressing it down as you go to prevent trapped air. Use firm, even pressure across the full label, with extra attention around edges and corners. On curved plastic, smaller labels are often easier to apply successfully than one oversized decal fighting the shape of the container.
Adhesives generally build bond strength over time. Avoid judging performance in the first five minutes. Where possible, give freshly applied stickers a day or two before rough handling, washing or outdoor exposure. That gives the adhesive time to settle into the surface.
Adhesive is only one part of the decision. The sticker material and finish should also suit the way your product is used. Vinyl is a strong all-round option for durable decals, particularly when weather resistance and flexibility matter. It suits many outdoor and high-contact applications, from equipment labels to branded containers.
Paper labels can be a great choice for dry, indoor packaging where a more natural or premium retail look is the priority. They are not the first choice for wet environments, condensation or products that will be handled with damp hands. Clear stickers can give a polished, minimal look on transparent or coloured plastic, while white ink can help artwork and text remain visible when needed.
Design also affects performance. Keep vital text and fine details away from the very edge of the sticker. A slightly rounded corner is less likely to catch than a sharp one. For a busy product label, leave enough clear space around key information so the design still reads quickly on a shelf, in a work vehicle or across a counter.
If your product matters, test it as your customer will use it. Put a sample on the exact plastic surface, not a similar one. Rub it, squeeze it, refrigerate it, leave it in sunlight or wipe it down if those are normal conditions. Check for edge lift, bubbling, print wear and any change in appearance.
For businesses ordering at scale, this is also the time to check label size, placement and readability. A label that technically sticks but covers a seam, curve or important product information is still not doing its job. A short test run lets you correct those details before you commit.
Fast Stickers can help turn a supplied design, rough idea or existing label into a print-ready sticker suited to the job. Free artwork assistance and proof revisions are particularly handy when you are working out sizing, shape or the best material for an unfamiliar plastic surface.
A sticker is often the first thing a customer touches on your product. Give it an adhesive that can handle the journey, and your brand has a much better chance of looking sharp from the packing bench to the customer’s hands.
Digital versus offset printing explained for Australian businesses. Compare cost, speed, colour, quantities and the right choice for your next print run.

Creating QR code stickers for packaging, shops and events? Get the design, sizing, testing and material choices so every scan works in Australia.
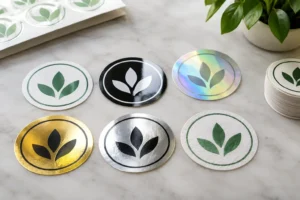
Compare popular sticker finishes for branding, from gloss and matte to clear, metallic and more, so every label, product or promotion looks spot on too.
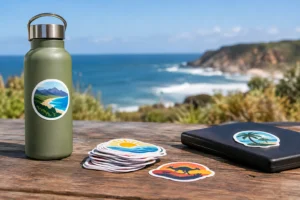
Choose outdoor sticker materials that stand up to sun, rain, salt spray and daily wear, with practical advice for labels, vehicles, windows, gear and more.
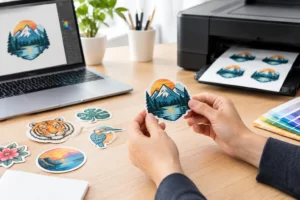
Need a sticker artwork design service? Get print-ready designs, unlimited proof changes and durable custom stickers made for tough Australian weather, promptly.