

Custom Stickers Melbourne
Custom Stickers Melbourne: The Complete 2026 Guide for Victorian Businesses Picture this: it’s a Thursday afternoon in a Brunswick café. The new logo finally landed
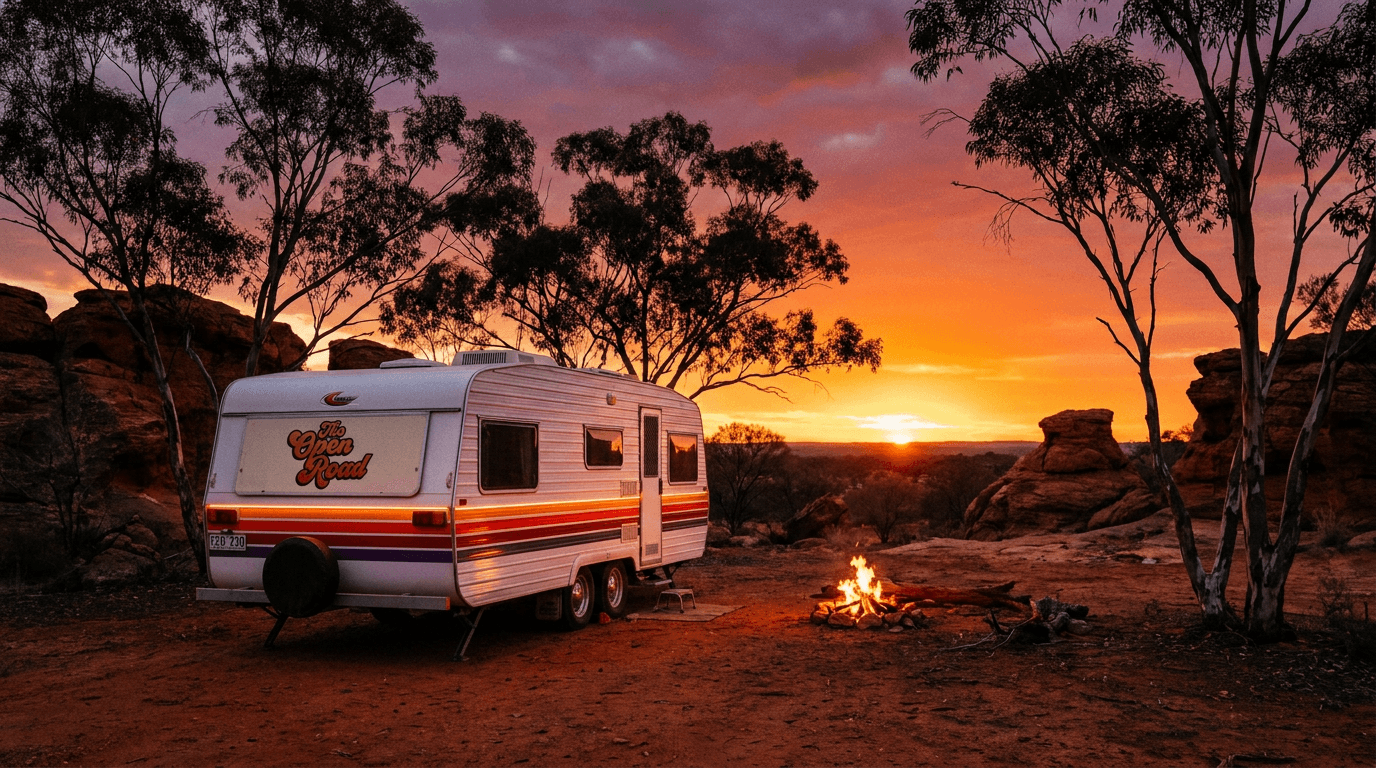
Picture this. You’re somewhere outside Broken Hill, South Australia. The red dirt stretches flat and endless to the horizon, the sky above is so vivid and blue it looks painted, and your caravan sits at the edge of the campsite — looking exactly like every other white fibreglass box in the row. It’s a stunning setting. Genuinely, jaw-droppingly beautiful. But it’s not yours. Not yet.
Now imagine that same scene — except your van has a bold, rust-and-ochre stripe kit running its full length, your family name arched across the rear in clean white script, and a hand-drawn silhouette of Australia’s coastline marking every state you’ve already crossed off. That’s yours. That’s a van with a story written on the outside before a single word is spoken. And in 2026, more Australian caravanners than ever are discovering that this is exactly the kind of story worth telling.
Custom caravan stickers and decals have become one of the most meaningful — and most practical — upgrades an Australian van owner can make. According to Tourism Research Australia, there are now almost 938,000 registered caravans and campervans in Australia as of 2025, representing a 32% increase over the past decade. The caravan lifestyle isn’t a niche anymore. It’s one of Australia’s fastest-growing lifestyle sectors, expanding at around 7% compound annual growth, and it’s home to a community of people who care deeply about the rigs they travel in. In a sea of white fibreglass boxes, your caravan stickers are your signature.
This guide is the most comprehensive Australian resource for everything related to custom caravan stickers. Whether you’re a Grey Nomad looking to restore faded factory graphics, a young adventure family wanting to personalise a new off-road van, or someone hunting for the right stripe kit to make your camper unmistakable at every holiday park from the Kimberley to the Capes — this guide has you covered.
Here’s what you’ll find inside:
Let’s hit the road.
There’s a temptation to think of caravan stickers as purely cosmetic — something you add when everything else is sorted, a nice-to-have rather than a necessity. That view underestimates them significantly. The real value of custom caravan stickers runs much deeper than aesthetics, touching on identity, safety, practicality, community, and even financial return. Understanding that full picture is what separates a considered decision from a decorative afterthought.
A caravan is not just a vehicle. For the millions of Australians who live the caravanning life — even seasonally — it’s a home away from home. It holds your bed, your kitchen, your family, your routine, and your rhythm. It’s where you wake up to the sound of kookaburras in the Grampians and where you make coffee while the sun rises over the Gulf. The idea that something so personally significant should look identical to every other van on the road is, frankly, a little sad.
Personalised caravan stickers solve that with elegance and simplicity. A custom name decal — The Wandering Wallaces, Dirt Road Dreaming, The Travelling Turners — transforms an anonymous white box into a vehicle with a personality. A stripe kit in your chosen colours gives it a visual presence that reads from fifty metres across a crowded holiday park. These aren’t vanity additions. They’re the visual language of ownership — the same impulse that makes people choose a different colour for their front door or hang art on their walls. Your caravan deserves the same treatment.
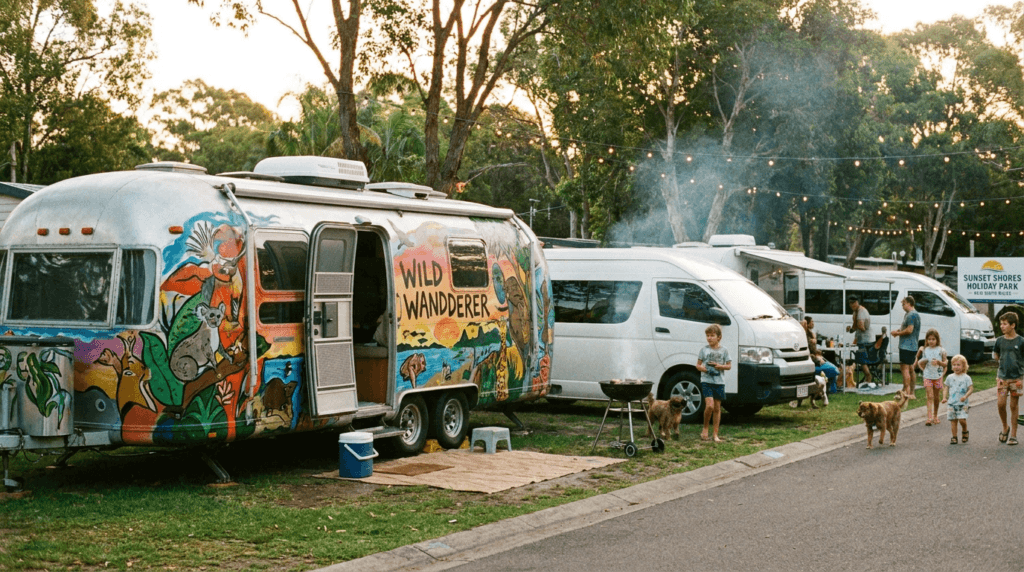
Here’s something less discussed but genuinely useful: in a packed holiday park at Easter or Christmas — the kind of sprawling sites at Airlie Beach, Rainbow Beach, or the Eyre Peninsula that feel like small suburbs — modern caravans look remarkably similar. Same white fibreglass profiles, same roof racks, same awning arrangements. Identical rear ends staring back at you as you navigate the rows. A distinctive stripe kit or name decal means your family can spot your van from a distance. Kids can find their way back without a landmark-by-landmark description. Partners can direct visitors. It sounds trivial until the moment it actually matters.
One of the most overlooked applications for caravan decals australia-wide is the restoration market. Older caravans — Jaycos, Coromals, Avan, Windsor, Regent — often have factory graphics that have faded, cracked, bubbled, or peeled after years of Australian UV exposure. These faded graphics make a van look substantially older than it is, and they can significantly affect resale price even when the mechanical and structural condition is excellent.
Replacement caravan decals that reproduce or reimagine original factory graphics restore the van’s visual presentation and protect its value. It’s a genuinely cost-effective investment: a quality set of replacement graphics applied to a well-maintained older van can add real dollars to a private sale price by eliminating one of a buyer’s first negative impressions. The Caravan Industry Association of Australia estimates the resale market for used RVs is enormous — and appearance matters at the first moment of a buyer’s inspection.
Not all caravan stickers are aspirational. Some are functional and legally relevant. Reflective safety strips along the rear and sides of a caravan improve night visibility significantly — a meaningful safety measure when your van’s rear is sitting out in the dark at a rest stop or roadside campsite. Emergency contact stickers, listing the owner’s name, phone number, and blood type, serve a clear purpose in the event of an accident in remote areas. Registration labels and compliance plates need to be maintained and legible. These are stickers for caravans that carry genuine safety weight.
Caravanning in Australia carries a culture as distinctive as any subculture in the country. The Grey Nomads who complete lap-of-Australia pilgrimages with military precision. The young adventure families who squeeze school holidays into off-road explorations of the Gibb River Road. The weekend couples who spend every Friday afternoon hitching up and heading bush. This is a community that values craftsmanship, personalisation, and the expression of individual character — and personalised caravan stickers are part of that language. They’re conversation starters at the camp kitchen, icebreakers at the fire, and a quiet signal that says: we’re the same kind of people.
The practical, social, and financial dimensions of custom caravan stickers are all real — and they collectively make the case for investing in them properly. Now that we understand why they matter, let’s explore the full landscape of what’s actually available.
The world of caravan decals is broader than most people realise when they first go looking. It spans everything from a simple die-cut name sticker to full-side graphic panels that transform a van’s entire visual identity. Understanding the distinct types — what they are, what they’re best for, and how they’re applied — helps you make a precise decision rather than a vague one.
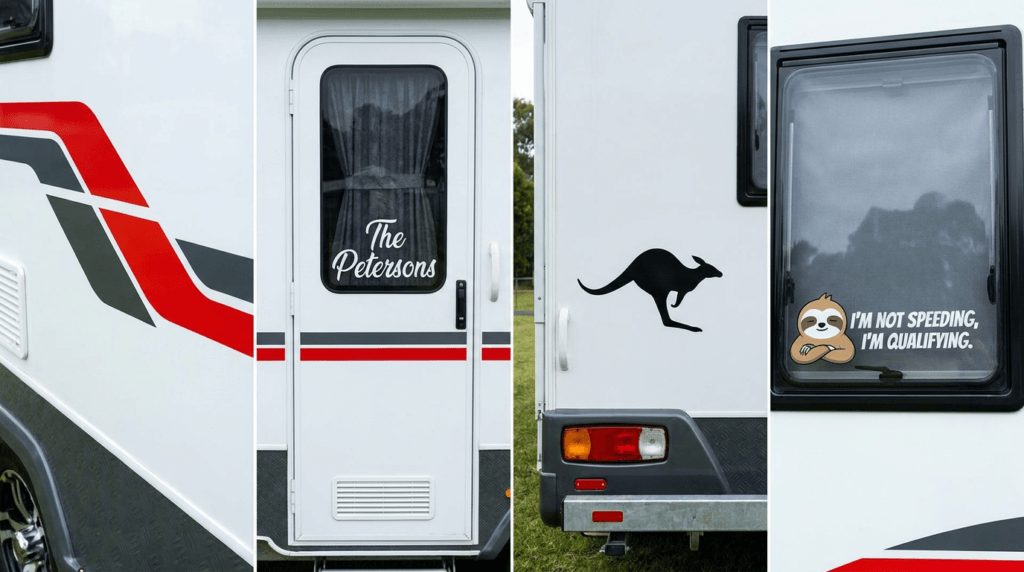
The stripe kit is the cornerstone of caravan personalisation in Australia and has been for decades. Long, horizontal vinyl strips — typically running the full length of the caravan body — applied in two or three coordinated colours create an instant visual cohesion that makes any van look purposeful and designed. Factory-style stripe kits are designed to replicate or complement a van’s original manufacturer graphics. Fully custom stripe kits, on the other hand, can be anything: a bold two-tone in ocean blue and white, a desert-palette combination of burnt orange and charcoal, a retro single-stripe in classic 1970s gold.
The appeal of the stripe kit is in its proportional impact. A well-chosen set of stripes can make a small caravan look longer, make a tall profile feel more grounded, and give an otherwise featureless exterior a genuine sense of visual energy. Fast Stickers’ vinyl sticker rolls are particularly well-suited to these long-run applications, providing continuous lengths of premium outdoor vinyl that eliminate the seam lines that sectioned approaches create.
If the stripe kit is the backdrop, the name decal is the signature. Custom text — your family name, your van’s nickname, a travel motto — die-cut from premium vinyl and applied in your chosen font, size, and colour creates an instantly personal statement that no catalogue product can replicate. Script fonts feel romantic and adventurous. Bold block lettering reads with authority from distance. Stencil styles carry a rugged, expedition-ready character that suits off-road builds particularly well.
This is where personalised caravan stickers in Australia find their most expressive form. The name or phrase becomes the van’s identity — Free Range, The Open Road, Red Dirt Family — applied once and read thousands of times by everyone who passes behind you on the highway. Die-cut stickers are the ideal production method here: the vinyl is cut precisely to the shape of each letter, leaving no visible background film, just clean vinyl type floating on the caravan surface.
Custom artwork takes caravan graphics australia-wide to their most expressive level. A kangaroo silhouette in matte black on a white rear panel. A kookaburra perched on a branch in full-colour glory across a side wall. A compass rose centred on the entry door. The Southern Cross rendered in small white dot decals against a dark stripe. Banksia flowers in ochre and rust. These aren’t mass-produced novelties — they’re genuinely custom graphic decals produced from your artwork brief, your concept, or your sketch.
The Australian landscape and its wildlife offer an extraordinary vocabulary for caravan graphic design. Native flora and fauna translate beautifully into die-cut or full-colour printed decals, and they carry a visual meaning that resonates immediately with fellow travellers. Your van tells people something about the country you love before you’ve said a word.
A substantial and growing segment of the caravan sticker market in Australia centres on restoration — reproducing original or upgraded graphics for older vans where the factory decals have deteriorated. For owners of heritage vans, a quality set of replacement decals can be transformative: stripping old, cracked graphics and fitting fresh reproductions makes a 15-year-old caravan look immediately younger and better presented. For those who want to reimagine rather than restore, it’s an opportunity to redesign the van’s livery entirely — new colours, new layout, new character.
The rear window and lower rear panel of a caravan are prime real estate for a different category of sticker: the functional-personal hybrid. This includes the much-loved humour decals that populate Australian campgrounds (No Free Camping Without a Yelling Distance, Not All Who Wander Are Lost — Some Are Just Reversing), campsite registration stickers, family and pet silhouette collections, and travel destination maps that mark the growing list of places you’ve camped. Bumper stickers in premium outdoor vinyl work perfectly in these rear-panel applications, offering the same UV and weather resistance as full caravan body decals.
For caravanners who spend time off-road or camping in remote areas, reflective safety strips are more than an aesthetic choice. Applied along the lower rear and sides of the van, reflective vinyl significantly improves night-time visibility at a fraction of the cost of electronic lighting solutions. Emergency contact stickers — listing owner contact details, medical information, and emergency protocols — serve a clear practical purpose in areas where response times can be long.
At the most dramatic end of the spectrum, large-format printed graphic panels cover a substantial portion of the caravan’s exterior with a single cohesive design. These are the caravan vinyl stickers that create the full wrap-like transformation — a mountain range silhouette spanning the full side elevation, an abstract wave pattern bleeding from the front corner to the rear, a photographic landscape rendered in fine-detail printing. These are the most impactful visual upgrades short of a complete vehicle wrap, and in 2026, the availability of premium large-format printing from Australian suppliers has made them more accessible than ever.
With a clear picture of the types available, the next critical question is what they’re actually made from — because in Australia, material choice isn’t a minor consideration. It can be the difference between a decal that lasts eight years and one that looks embarrassing before your second summer.
This is the section that separates informed buyers from disappointed ones. Australia is not a forgiving environment for outdoor materials. Our UV radiation index is among the highest on Earth, sustained across the majority of the continent for the majority of the year — not as an occasional peak, but as a relentless baseline that degrades unprotected vinyl, fades inks, softens adhesives, and attacks laminates with a thoroughness that would surprise anyone used to European or North American material specifications.
Choosing the right material for your caravan decals australia conditions demand is not optional. It’s the foundation of everything else.
The single most significant material decision for caravan sticker applications is whether to use cast vinyl or calendered vinyl — and most buyers have never heard of either.
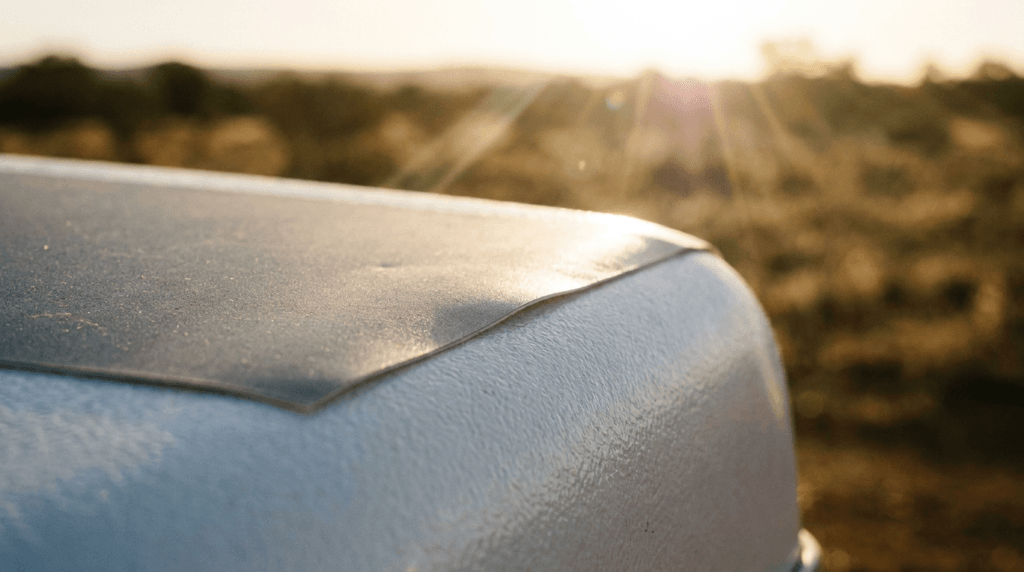
Cast vinyl is manufactured by pouring liquid PVC resin onto a casting sheet and allowing it to cure. This process produces a very thin (2–3 mil) film that has no internal stress or molecular memory. It conforms readily to curved and compound surfaces — exactly what the curved, riveted, contoured body panels of a modern Australian caravan present. Cast vinyl’s outdoor lifespan in properly specified grades reaches 5–8 years, and its UV resistance properties are superior to calendered alternatives. For caravan stripe kits, body graphics, and any decal applied across a curved or contoured surface, cast vinyl is the correct material.
Calendered vinyl is manufactured by pressing and rolling PVC compound through heavy rollers — a process that produces a thicker (3–4 mil) film with some degree of molecular stress built into its structure. This internal stress means calendered vinyl resists conforming to curves; over time on a compound surface, it can try to return to its flat state — manifesting as edge lifting, bubbling, or delamination. Its outdoor lifespan in Australian conditions typically falls in the 3–5 year range. Calendered vinyl is appropriate for flat surface applications, indoor graphics, or shorter-term uses — but it is not the premium specification for outdoor caravan body applications.
“Australia’s UV index can be up to three times higher than in the UK. Your caravan decals need to be engineered for that reality — not simply printed on vinyl rated for milder climates.”
The UV Index in northern Australia regularly climbs into the 11–14 range during summer — the internationally classified Extreme category, with no upper bound. Even in southern Australian cities, summer UV Index values of 10–12 are routine. Standard vinyl products rated for European conditions — where UV Index 8 is considered a hot summer day — simply don’t translate to Australian outdoor performance. They’ll fade faster, crack earlier, and lift sooner than their specification labels suggest.
This is why seeking out UV-stabilised vinyl and UV-resistant inks isn’t a premium upgrade in Australia — it’s the baseline requirement for any caravan decal intended to last. The UV stabilisers incorporated into the polymer matrix of properly specified outdoor vinyl provide the material itself with inherent resistance to photodegradation. UV-resistant inks add a second line of defence at the print layer. Together, they give your decals a fighting chance against conditions that would rapidly destroy anything less.
A protective laminate layer — applied over the printed surface of the decal — is arguably the single most important contributor to outdoor lifespan for full-colour printed caravan graphics. The laminate serves two functions simultaneously: it creates a physical barrier against road dust, insects, abrasion, and regular washing; and it contains UV absorbers that intercept incoming UV radiation before it reaches the ink layer beneath.
Think of the laminate as the sticker’s sunscreen — it takes the UV hit so the colours underneath don’t have to. Over years of sustained exposure, the UV absorbers in the laminate are gradually consumed as they perform their protective function. This sacrificial action is by design, and it’s why a properly laminated caravan decal can outlast an unlaminated one by two to three years, even when both use identical inks and substrates.
The adhesive choice matters far more than most buyers consider. Permanent adhesive is the correct specification for exterior caravan body panels — it establishes a strong, weather-resistant bond intended to remain in place for the full life of the decal. For applications requiring maximum bonding confidence — particularly on older van surfaces, powder-coated metal panels, or textured fibreglass — high-tack adhesive formulations provide an extra margin of security that standard adhesives can’t match.
Removable or repositionable adhesive is appropriate for interior cabin panels, glass windows, and any application where you want the flexibility to reposition or remove the decal without damaging the underlying surface. It’s also the right choice for caravans on lease or those that change hands frequently.
The finish of your caravan vinyl stickers affects both their visual character and their practical performance.
Fast Stickers uses the same marine-grade premium vinyl materials for caravan decals as for boat stickers — a standard developed for surfaces that face sustained UV, saltwater, and mechanical stress. If it survives the marine environment, it’s more than ready for the outback.
With a solid grasp of what makes a caravan decal built to last, it’s time to move into the most personally exciting territory — designing one that’s unmistakably yours.
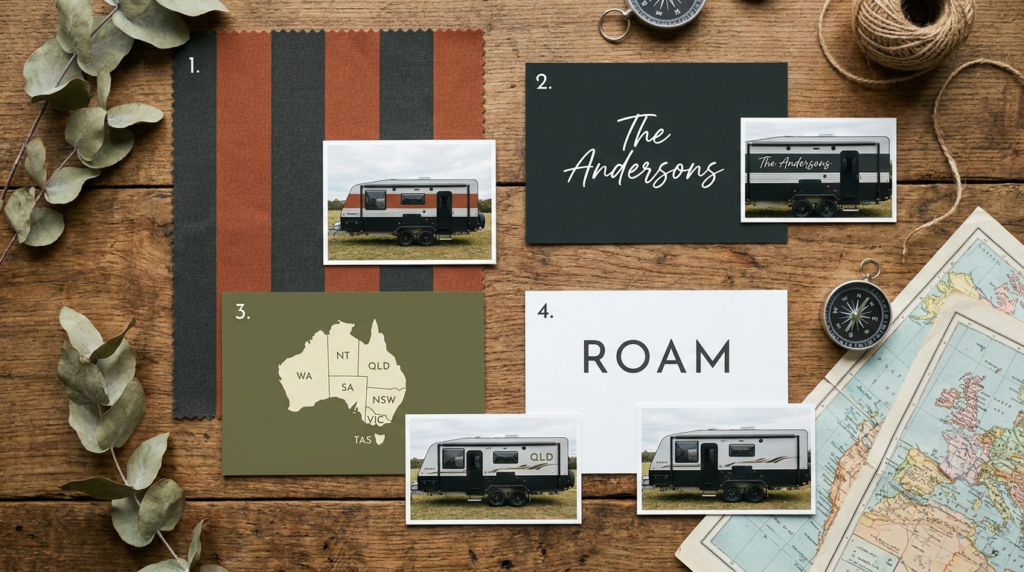
The design phase is where your caravan stops being a generic canvas and starts becoming a rolling piece of who you are. It’s the part of the process most people find both the most exciting and the most intimidating — particularly if they’ve never briefed a design before, or if they don’t think of themselves as visually creative. The truth is, great caravan sticker design rarely comes from a blank canvas. It comes from a feeling, a place, a word, a memory — and from knowing enough about what’s possible to articulate that to the right people.
Two or three bold horizontal stripes are the most enduringly popular caravan aesthetic in Australia, and there’s good reason they’ve lasted decades: they work. The proportional effect of a well-executed stripe kit — making a van look longer, lower, more aerodynamic — is real and significant. But the era of accepting generic factory colour combinations is over. In 2026, custom colour combinations are the differentiator.
Dusty rose and slate grey feels surprisingly fresh and modern on a van. Deep ocean blue paired with clean white reads as crisp and coastal. Burnt orange, khaki, and a thin white accent line feels desert-born and distinctly Australian. Rust and charcoal with a metallic silver separator stripe is bold enough to command attention in any campsite. The stripe kit is your most versatile canvas, and when the colours are chosen with intention, the result is a van that looks like it was designed that way from the factory — except better, because it was designed for you.
There is something quietly powerful about a caravan that carries a name. Not a manufacturer’s badge. Not a model number. A name — chosen by the family who live in it, that tells anyone who reads it something true about who they are.
The Wandering Wallaces in a clean sans-serif on the rear panel suggests an organised family with a sense of adventure. Dirt Road Dreaming in a brushed-script font on the door says something more romantic, more improvisational. Red Dust & River Crossings announces an off-road intention with quiet confidence. These are personalised caravan stickers at their most meaningful — single lines of text that carry enormous identity weight.
The font choice is everything here. Script fonts read as warm and personal. Bold block capitals feel grounded and strong. Stencil-style lettering carries a military-expedition energy that suits lifted, off-road builds. The colour should work with or against the stripe kit deliberately — white on dark stripes for maximum legibility, black on white panels for graphic clarity, metallic gold when you want something that catches the afternoon sun.
Australia’s natural world offers some of the most visually distinctive imagery on Earth, and it translates extraordinarily well to caravan graphic decals. Consider what’s available in the vocabulary: the silhouette of a kangaroo in mid-bound; a kookaburra perched on a scribbly gum branch; the angular geometry of Uluru at golden hour; the sweeping arc of a southern cross constellation; the intricate symmetry of a banksia flower; coastal waves along a lower body stripe.
These aren’t tourist-shop clichés. Properly executed as custom die-cut vinyl decals — with attention to scale, placement, and colour — Australian nature graphics give a caravan an organic visual quality that feels earned rather than applied. A kangaroo silhouette in matte black on a white rear panel, sized generously and placed with confidence, reads as bold design rather than souvenir decoration. A southern cross cluster of small white dots on a deep navy stripe speaks to every Australian’s relationship with the night sky above a remote campsite.
For caravan graphics australia-wide, the die-cut sticker format is ideal — producing your custom graphic in the exact shape of the artwork with no visible background carrier film, so the decal appears to be painted directly onto the van surface.
One of the most creative and increasingly popular caravan personalisation concepts is the travel map decal. An outline of Australia — or a specific region — applied to the rear window or side panel, where each destination or state visited is marked with a pin, a star, or a colour fill. The map begins sparse. Over years of travel, it fills in. By the time you’ve done your third lap, it’s a visual autobiography of everywhere you’ve been — and a conversation starter at every campsite in the country.
The practical beauty of this concept is that it can be executed simply or elaborately. A clean outline of the Australian continent in clear vinyl, with self-adhesive star markers added manually as you go, costs very little. A fully designed, custom-illustrated map with state labels, major highway routes, and illustrated landmarks is a piece of art that will genuinely stop people in their tracks at the ablution block.
Not every powerful caravan decal is complex. Sometimes a single word, chosen well and applied with scale and confidence, says everything that needs saying.
ROAM on the rear panel in 200mm charcoal capitals. FREE in white brushstroke script along the bottom of the front wall. EXPLORE running vertically up the door in a clean geometric font. WANDER in matte black on a white van’s lower quarter panel. These minimalist typographic decals carry a clarity that complex graphics sometimes can’t match — they’re the van equivalent of a bold magazine headline, and they read from a distance with immediate impact.
The design service at Fast Stickers means you don’t need to arrive with a finished file. A concept — a word, a feeling, a font reference, a Pinterest image you love — is enough to start the conversation. From there, the team will build the artwork and send you a proof to approve before anything goes to print. If you’re ready to start exploring what’s possible, request a custom quote here — or browse the artwork and print quality guide if you want to understand the design file requirements before you brief.
Once you’ve found your design direction, the next step is understanding how to turn that inspiration into a finished, printed-and-shipped set of caravan stickers — which is exactly what the following section covers.
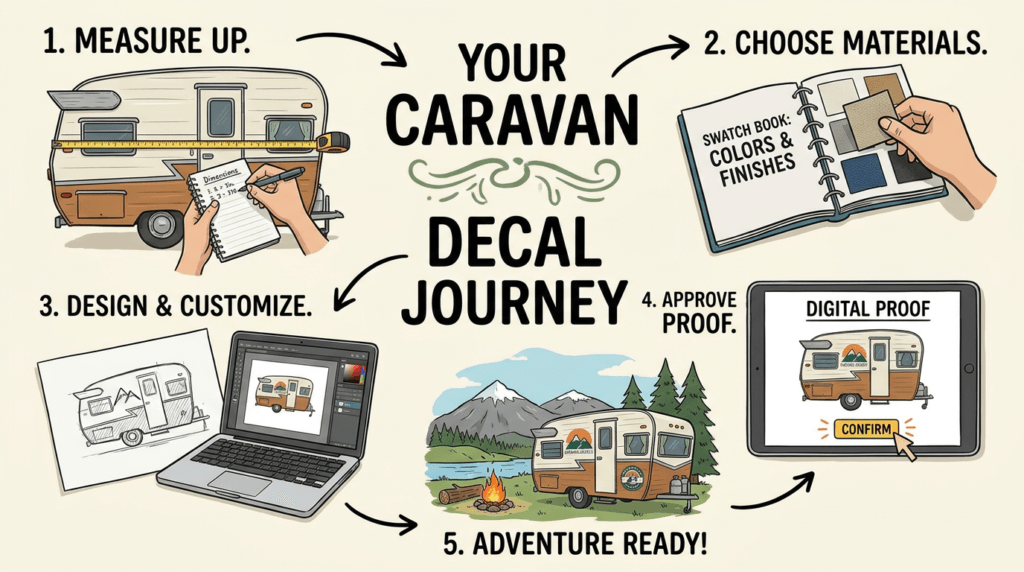
The ordering process for custom caravan stickers is simpler than most people expect — but there are a handful of decisions and preparations that make the difference between a smooth experience and a frustrating one. This buyer’s guide walks through the process step by step, addresses the questions Australian buyers most commonly have, and flags the things worth knowing before you place your order.
Before you think about design, colours, or fonts, you need accurate measurements of the surfaces you’re working with. Grab a tape measure and note the full width and height of each panel where you plan to apply a decal. For stripe kits, measure the full length of the caravan body from front to rear, noting any interruptions — wheel arches, vents, external power sockets, rivets, roof joins — that the vinyl will need to work around.
Take photographs of the panels in good light from directly in front and from the rear. These photos are enormously useful when briefing a design, because they allow the designer to check proportions, placement, and how the decal will interact with the van’s existing features. For contoured or curved areas, note the degree of curvature — this affects the material specification (cast vinyl conforms; calendered vinyl resists) and the installation technique.
Different panels and different applications require different material specifications. The guide in the previous section covers this in detail, but the practical summary for ordering purposes is:
This is where many people hesitate unnecessarily. Fast Stickers’ free artwork design service means you do not need a finished design file to place an order for custom stickers for caravans. What you need is a direction — a concept sketch on paper, a mood board, a photograph of a van you like, a description of the colours and style you’re after, or simply the words you want applied.
If you do have a design file, the Artwork & Print Quality Guide explains the ideal specifications: vector formats (AI, EPS, PDF) give the sharpest print output at any scale; high-resolution JPEG or PNG files at 300dpi or above are also workable. For stripe kits and large-format graphics, vector artwork is strongly recommended to avoid pixelation at the dimensions involved.
Once your design is prepared, you’ll receive a full-colour digital proof before anything goes to print. This is your moment to scrutinise every detail — spelling of names, colour choices, sizing relative to the panel dimensions you’ve provided, placement of each element. Check the proof on a well-calibrated screen in good light. Cross-reference against your panel measurements. Confirm that the font is exactly what you discussed. Don’t rush this step. Errors caught at the proof stage cost nothing to fix. Errors discovered after printing cost time and money for everyone.
If anything looks even slightly off, ask about it. The design team would rather address a question at proof than produce something that doesn’t match your vision.
Fast Stickers operates on a 2–3 business day production timeline for most orders, with free express shipping Australia-wide once your order dispatches. That means from proof approval to decals in your hands is typically 3–5 business days total — fast enough for most situations, but worth factoring into your planning. If your caravan trip departs in a week, order now rather than Thursday.
For Australian buyers specifically, a few additional considerations are worth noting:
Ready to start? You can browse the full sticker shop and order online, or request a custom quote for complex designs, large stripe kits, or anything that benefits from a direct conversation with the team.
Your decals are ordered, they’ve arrived at your door, and they look exactly as designed. Now comes the moment that either makes or breaks the whole investment — the installation. Here’s how to do it right.
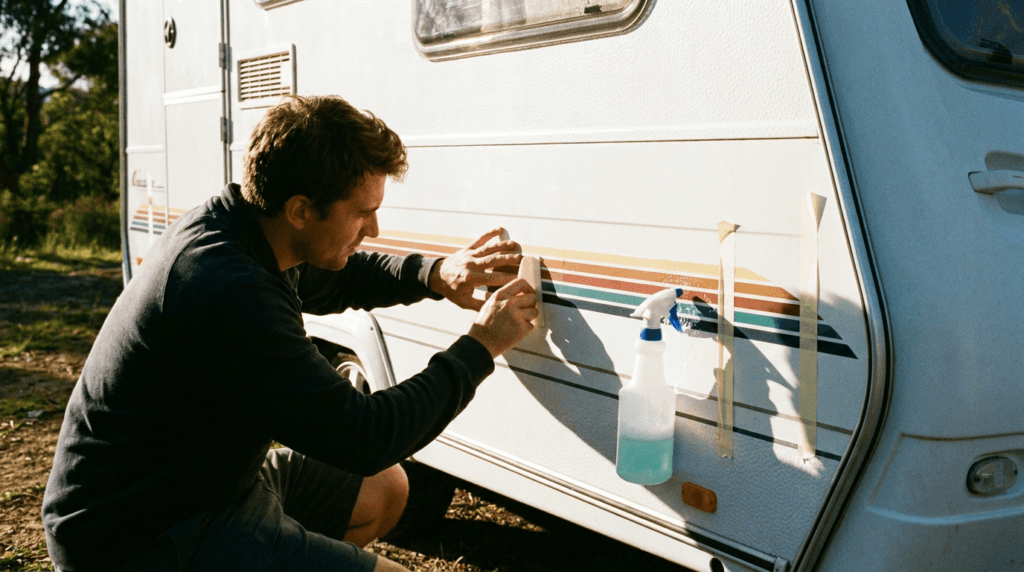
Installing caravan decals is one of those jobs that looks intimidating from the outside and feels entirely manageable once you understand the method. Done correctly — clean surface, correct temperature, the right technique — you get a result indistinguishable from a professional installation. Done incorrectly, you get bubbles, misalignment, or lifting edges within weeks. The difference is almost entirely in preparation and patience, not in skill.
Gathering your tools before you begin makes the installation process smooth and uninterrupted. You’ll need:
The single most important factor in caravan decal installation success is the condition of the surface before the decal touches it. Every professional installer will say the same thing: the application is only as good as the preparation.
Start by washing the entire panel with warm soapy water and a clean sponge, removing road grime, bird droppings, and surface dirt. Rinse thoroughly and dry with a clean microfibre cloth. Then — and this step is non-negotiable — wipe the entire application area with isopropyl alcohol on a fresh microfibre cloth. This removes the invisible wax residues, silicone polishes, and oil films that vehicle surfaces accumulate from regular washing and detailing. Even a microscopic layer of wax between the adhesive and the panel surface compromises bond strength from the very first moment. Allow the surface to dry fully — at least five minutes — before proceeding.
Do NOT apply decals over recently waxed or silicone-treated surfaces, even after an alcohol wipe. If your van has been detailed recently, give it a couple of days and a thorough alcohol clean before installing.
Caravan decal adhesive is designed to bond optimally in a specific temperature window: between 10°C and 32°C. Below 10°C, the adhesive becomes stiff and doesn’t flow properly into the surface texture, producing a weaker initial bond. Above 32°C — or on a panel that’s been sitting in direct Australian afternoon sun — the adhesive activates almost instantly on contact, before you have any opportunity to reposition.
The ideal installation conditions are a mild morning, in the shade, with the van surface warm but not hot. In northern Australia during summer, this may mean starting at 7am before the day heats up. In southern Australia in winter, let the van warm up in morning sunlight before beginning. The surface should feel comfortably warm to the touch — not hot, not cool.
This step is where patience pays. Before removing any backing from the decal, position it on the panel using strips of masking tape as a hinge along one edge. Step back — well back — from the van and assess the alignment from multiple angles. Check that the top edge is truly horizontal relative to the roofline. Check that the decal is centred on the panel as intended. Ask your helper to stand at one end while you stand at the other and call out any height discrepancies.
Spending five minutes getting the alignment perfect before the adhesive touches the panel is always better than five minutes of regret after it does.
For any decal longer than about 300mm — and certainly for full-length stripe kits — the wet method is the recommended installation technique for decals for caravans. It gives you time to reposition after application, which is invaluable when working with a decal that’s two or three metres long.
Lightly mist both the panel surface and the adhesive side of the decal (after removing the backing) with your soapy water spray bottle. The soap film temporarily reduces the adhesive’s grip, giving you a window of ten to fifteen seconds to slide the decal into position. Once correctly placed, use your squeegee to work from the centre of the decal outward in firm, overlapping strokes — pushing the water and any air pockets toward the edges and out. Apply firm, even pressure. Overlap each squeegee pass by about half its width to avoid leaving water channels.
After squeegeeing, allow the decal to sit for 24–48 hours to cure fully before the first wash. The soapy water needs to evaporate through the edges, and the adhesive needs time to establish its full bond with the surface. Avoid pressure washing or driving in heavy rain during this curing period.
For smaller decals — name stickers, graphic decals under 200mm, individual letters — the dry application method is simpler and appropriate. Position the decal using your alignment tape hinge, then fold back the backing paper to expose about a third of the adhesive surface. Starting from the hinged edge, apply the exposed adhesive section to the panel and squeegee that section down firmly. Slowly peel the remaining backing while continuing to squeegee forward in sections, working from the applied area into the unapplied portion.
Most die-cut decals come with a transfer tape layer covering the face of the sticker. Once the decal is applied and squeegeed, this tape needs to be removed carefully. Pull it back at a 180-degree angle — folding it back over itself, directly back against the panel surface, rather than pulling it away at an angle. A slow, steady pull at this angle dramatically reduces the risk of the decal lifting with the tape. If any section of the decal begins to lift during tape removal, stop, squeegee that section firmly again, wait thirty seconds, and retry.
With your decals installed perfectly and looking exactly as you imagined, the final chapter is keeping them that way — through dusty outback tracks, coastal salt air, tropical monsoon seasons, and everything the Australian road throws at your van.
A quality set of premium cast vinyl caravan decals, properly installed, can look sharp for five to eight years in Australian conditions. But that lifespan isn’t automatic — it’s earned through a few consistent habits that protect your investment over time. None of them are complicated. Most take seconds. And together, they make the difference between decals that still look great in year six and ones that begin to look tired by year three.
The first 48–72 hours after installation are the most critical period in a decal’s life. During this window, the adhesive is still curing — flowing into the microscopic texture of the panel surface and building its full bond strength. Full adhesive cure typically takes up to seven days, but the first 48 hours are when the bond is most vulnerable.
During this period: no pressure washing, no automatic car washes, no prolonged rain exposure where possible, no harsh cleaning products on or near the decal edges. If light rain occurs, it won’t be catastrophic — but avoid deliberately washing the van. Allow the adhesive to do its work undisturbed.
Once the curing period is complete, regular cleaning is straightforward. Hand washing with a pH-neutral car wash soap and a soft microfibre mitt is the gentlest and most effective approach. Work in smooth, light strokes across the decal surface — no scrubbing, no abrasive sponges, no rough cloths. Rinse with low to moderate pressure water flow rather than a high-pressure jet.
If you use an automatic car wash, be aware that the sustained high-pressure spray cycles in brushless wash systems can progressively attack decal edges over many sessions — particularly if the spray nozzle passes directly over the edges at close range. The occasional automatic wash won’t be catastrophic for a well-applied decal, but regular use will incrementally reduce its lifespan. Hand washing is the better habit for anyone who wants to get maximum years from their caravan vinyl stickers.
Avoid directing any high-pressure water jet directly at the edges of a decal. The edges are the decal’s most vulnerable point — sustained water pressure forces its way beneath the laminate edge and, over repeated washing cycles, gradually undermines the adhesive seal from the perimeter inward.
A quality UV-protective car wax or detailing spray applied over your decals — not just around them — provides an additional layer of UV protection on top of the laminate the decal already carries. This is the caravan equivalent of applying sunscreen over sunscreen: the first layer does the primary work, the second adds redundancy. Wax or detailing products with UV inhibitors are widely available at any automotive accessories store. Avoid silicone-based wax products, which can degrade the adhesive bond at the laminate edges over time with repeated application.
For caravans stored for extended periods — particularly in northern Australia or through summer months — a fitted caravan cover significantly reduces UV dose during storage. Your decals continue accumulating UV exposure even when the van isn’t moving; parking in shade and using a cover when in long-term storage adds meaningful time to the decal’s effective life.
Australia’s regional variety means caravan decal care has some geography-specific nuances worth knowing.
In far north Queensland and the Northern Territory during the wet season, post-monsoon inspections of your decal edges are worthwhile. Sustained flooding rain and elevated humidity can accelerate edge lifting if any section of adhesive was compromised during installation. Catching a lifting edge early — and pressing it back with a small amount of appropriate adhesive — prevents what becomes progressive delamination if left unattended.
In alpine areas — the Snowy Mountains, Victoria’s High Country — cold overnight temperatures can temporarily stiffen vinyl. This isn’t damaging in itself, but if you need to apply any remedial work to a decal (edge pressing, bubble treatment), allow the van to warm to ambient temperature first. Cold vinyl is less forgiving and more likely to crack under pressure.
In the Pilbara, the Kimberley, and South Australia’s outback, red dust is an ever-present reality. It’s abrasive in high concentrations, so periodic gentle rinsing — even just with a hose — before wiping down is better than wiping dust across a dry decal surface.
Even the best-specified and most carefully maintained caravan vinyl stickers eventually reach the end of their service life. The signs are gradual: slight colour fading at the edges (yellows and reds are typically first), then a reduction in overall vibrancy, then eventually edge lifting. Premium cast vinyl caravan decals — properly specified, correctly installed, and well maintained — should last five to eight years in Australian conditions. When they do reach the end of their life, replacement is a genuine opportunity: a chance to refresh your design, update your colours, or take the van in an entirely new creative direction.
For UV durability science applied to outdoor stickers more broadly, the Fast Stickers guide to UV bumper stickers for outdoor use goes deep on why Australian conditions demand premium materials — worth reading if you want to understand exactly what your caravan decals are up against on the road.
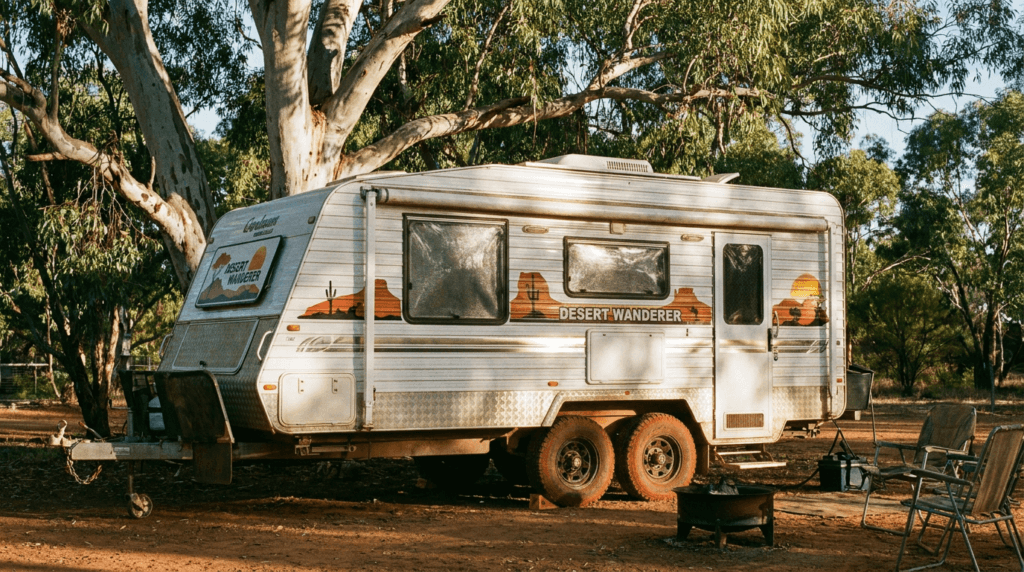
We’ve covered a lot of ground in this guide — appropriately enough. From the emotional case for personalising one of Australia’s most beloved lifestyle investments, through the full taxonomy of caravan sticker types, the material science behind what actually survives Australian UV conditions, a world of design inspiration drawn from the country itself, the practical mechanics of ordering from an Australian supplier, the step-by-step installation method, and the habits that keep a quality decal looking sharp for the long haul.
If there’s a single thread running through all of it, it’s this: a caravan is not just a vehicle. For the nearly 938,000 registered caravans and campervans on Australian roads in 2025, it’s a home, a lifestyle, a statement, and a rolling piece of who you are. It deserves to look like it.
Custom caravan stickers and decals are one of the most accessible, most durable, and most personally meaningful upgrades available to any caravan owner. They don’t require mechanical skills. They don’t void warranties. They don’t take weeks to plan. And when they’re produced with the right materials — premium UV-stabilised cast vinyl, UV-resistant inks, protective laminate, engineered for Australian conditions — they last for years through everything this country’s roads throw at them.
Fast Stickers is an Australian family business based in Gippsland, Victoria, with over 15 years of experience producing premium stickers and decals for Australian conditions. The materials are specified for the Australian climate — not European, not North American, Australian. The design service is free. The digital proof approval means nothing goes to print without your sign-off. Production takes 2–3 business days, and free express shipping reaches every corner of the country. The same marine-grade UV-resistant vinyl that keeps boat stickers intact through saltwater and sun keeps caravan decals crisp through the Kimberley, the Nullarbor, and everywhere in between.
The red dirt is waiting. The blue sky is waiting. The campsite at the edge of the outback is waiting. All that’s missing is a van that looks like yours.
Two clear paths forward — both starting with Fast Stickers.
Browse the Sticker Shop → — Explore the full range of premium outdoor vinyl products and place your order online today. Most orders are in production within 24 hours of proof approval, dispatching with free express shipping anywhere in Australia within 2–3 business days.
Request a Custom Quote → — For custom stripe kits, large-format graphic panels, complex multi-element designs, or anything that benefits from a direct conversation with the team. The free artwork design service means you can arrive with nothing more than an idea — the team will build the design, send you a proof, and get it perfect before a single sheet of vinyl is cut.
Have a question before you commit? Get in touch here →
Lightning Fast Stickers and Labels. Your caravan. Your story. Your road.
Custom Stickers Melbourne: The Complete 2026 Guide for Victorian Businesses Picture this: it’s a Thursday afternoon in a Brunswick café. The new logo finally landed

Picture this: it’s 9pm on a Tuesday in a spare room in Bendigo, and you’re sitting cross-legged on the floor because the table ran out

Picture this. It’s Friday night in a suburban Australian street — the kind where the smell of melted cheese and wood-fired dough drifts through open

The Complete Australian Guide for Beekeepers and Honey Producers Picture this: it’s a warm December morning in the Yarra Valley. The flow has been extraordinary

Picture this: it’s 6am on the Saturday before Mother’s Day, and a florist in Melbourne’s inner north is already three hours deep into the morning.