

Custom Product Labels & Packaging Stickers
Picture this: it’s 9pm on a Tuesday in a spare room in Bendigo, and you’re sitting cross-legged on the floor because the table ran out

Picture this: it’s a Thursday afternoon in a Brunswick café. The new logo finally landed in the inbox this morning, and it looks good — better than expected. There’s a market stall booked for Saturday. The takeaway cups need labels, the front window needs a decal, and somebody suggested putting something on the loyalty cards.
Three jobs. Three completely different surfaces. And a browser with eleven tabs open, all promising custom stickers Melbourne businesses can order online, none of them explaining which one is right for a cup lid versus a shopfront window.
That’s the actual problem. Not finding a printer — finding out what to ask for.
Because before artwork even enters the conversation, there are five decisions sitting in front of you: what material, what cut, what finish, how many, and whether to order locally or from somewhere offshore. Each one changes the outcome. Get the material wrong and the label lifts off a cold bottle in the fridge. Get the cut wrong and your team spends the market picking at sticker edges with their fingernails.
This guide is written to close that gap. By the end of it you’ll be able to place an order and know, with reasonable confidence, that what arrives will be correct.
A quick word on who’s writing. Fast Stickers is a family-owned printer based in Gippsland, Victoria, printing stickers and labels for businesses across Melbourne and the rest of the state. The work happens here. That shapes what this guide focuses on — real Victorian conditions, real freight distances, real seasons.
Here’s what’s covered: how different Melbourne industries actually use stickers, how to choose a material that survives its environment, what the cut and finish terminology means in plain English, what separates a product label from a promotional sticker, how to prepare artwork that prints the way you expect, and how to evaluate any printer before you hand over a file.
The starting point is worth stating, because most owners underestimate it: stickers are quietly doing more jobs in a Melbourne business than anyone gives them credit for.
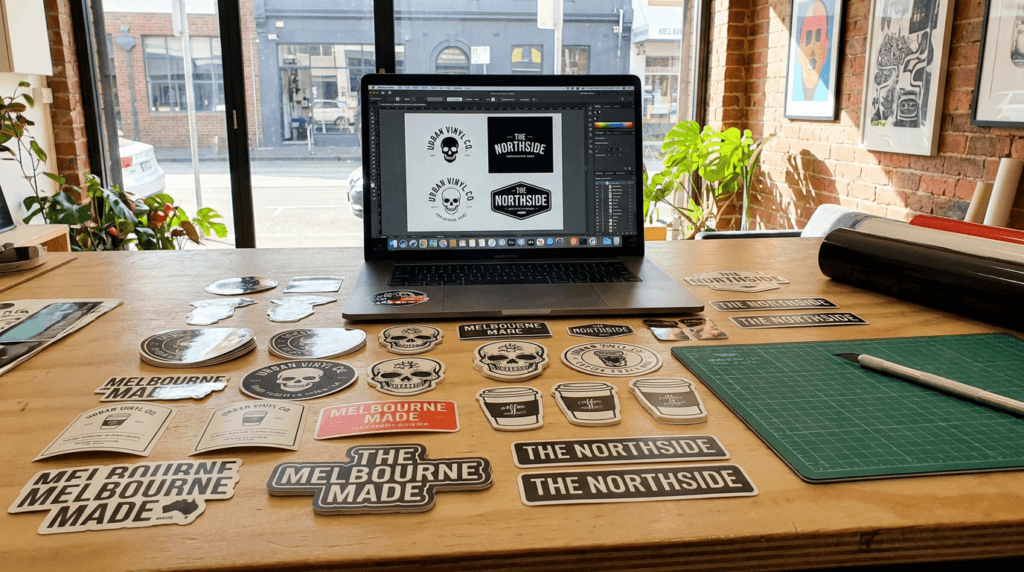
A sticker is rarely just a sticker. Depending on where it ends up, the same printed square of vinyl is packaging, signage, a security seal, a price tag, a loyalty device or a giveaway. Most businesses that order stickers Melbourne-wide are actually solving two or three of these problems in a single purchase order, often without realising the jobs have different requirements.
That’s worth slowing down on. The reason so many sticker orders disappoint isn’t poor printing. It’s that one specification got applied to several unrelated jobs. The window decal, the jar label and the thank-you seal all went on the same stock because they were ordered together.
So before material, before cut, before anything — it helps to see how businesses like yours actually use them.
Hospitality runs on small printed things. Cup lid seals that signal which order is oat and which is full cream. Keep-cup decals that turn a regular into a walking advertisement. Retail bag seals that close a bag and brand it in one motion.
Coffee roasters have a particular need: bag labels with a roast date panel, usually overprinted or hand-marked, which means the label surface has to accept pen without smudging. Then there’s the outside of the business — A-frame graphics, window hours, payment decals.
Food trucks add a complication most cafés don’t have. Everything is mounted to a vehicle that moves at highway speed through weather. If you run a hospitality venue and want to go deeper, there’s a practical breakdown of how restaurants use custom logo stickers on delivery packaging, and a dedicated guide for pizza shops covering box seals and delivery branding.
Drinks producers face the hardest labelling conditions of any category, and they face them constantly.
Bottle and can labels go onto cold, often damp surfaces. They sit in chilled storage, come out into a warm room, sweat, go back in. Keg collars need to survive a cellar. Tap badge decals live in a wet, wiped-down environment and get handled.
Then there’s cold-condition performance, which deserves its own conversation and gets one in the next section. Anyone labelling a product that will be refrigerated should treat that as the primary specification, not an afterthought.
If your business lives at Queen Victoria Market, Rose Street Artists’ Market or one of the suburban makers’ markets, your stickers have a job most product labels never face: they get packed, transported, unpacked, displayed, repacked and transported again, every single week.
Price stickers need to come off cleanly when prices change. Jar lid labels need to look intentional. Thank-you seals on a paper bag are often the last brand impression a customer takes home.
Signage is the underrated one. A laminated sign that lives in a crate between markets will outlast an unlaminated one many times over. Two vertical guides worth reading if they apply: custom stickers and labels for florists and a detailed piece on honey jar stickers and labels.

For an online seller, the parcel is the only physical contact a customer has with the business. Everything else is a screen.
That makes a satchel seal the cheapest brand touchpoint you will ever buy. Unboxing stickers, tissue-paper seals, returns labels, a small “thanks for supporting a small business” sticker on the invoice — these cost very little per unit and do work that paid advertising cannot.
QR code stickers are increasingly common in this category, linking a parcel to a review page, a reorder form or a care-instructions video. If you want the broader case, there’s a hub guide on custom stickers for small business.
Trades use stickers as infrastructure rather than marketing, which changes the requirements entirely.
Ute and van decals sit in permanent outdoor exposure and get washed. Asset tags go on tools and equipment that live in a trailer. Compliance and inspection stickers need to stay legible and stay attached — a tag that falls off a piece of equipment has failed completely.
Safety and warning labels have to survive the environment they’re warning about: heat, chemicals, abrasion, or all three. Real estate sits in this bracket too, where SOLD stickers go onto boards outdoors and need to apply fast and read clearly from the footpath.
Retail and venue stickers do quiet, constant work. Opening hours on the door. Payment and accessibility decals. Wayfinding inside larger spaces.
Promotional window runs are the seasonal version — a sale campaign that needs to go up in October and come down cleanly in November without leaving residue on the glass or an argument with the landlord. That’s a removable or static cling job, not a permanent vinyl one.
Event organisers need volume and variety at once: wristband seals, signage, sponsor decals, directional markers. There’s a specific guide on restaurant window graphics if shopfront glass is your main surface.
Read back through that list and one thing stands out. Every one of those jobs lives somewhere different — a freezer, a windscreen, a cardboard satchel, a shopfront in full afternoon sun. The environment is what decides the material, and that decision matters more than any other one you’ll make.
Before anything else, answer three questions. Where will this sticker live? For how long? And what will it get hit with?
Sun, water, cold, oil, handling, abrasion, cleaning products. Every material has a tolerance, and the failures people remember — the peeling corner, the faded logo, the label that slid off a bottle — are almost always a material chosen for a different environment than the one it ended up in.
Melbourne makes this harder than most cities, and not for the reason people assume. It isn’t extremity. It’s variability.
Vinyl is a plastic face stock. It’s waterproof, fade-resistant, and it conforms to curves rather than creasing across them — which is why it works on bottles, helmets, vehicle panels and anything that isn’t flat.
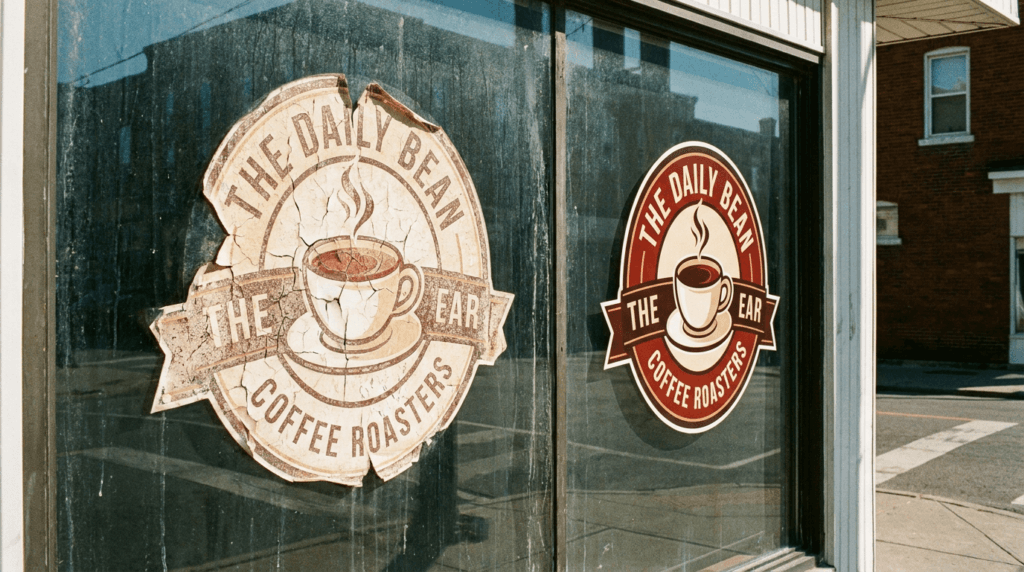
For anything outdoors, it’s the sensible default. A shopfront decal in Melbourne deals with summer ultraviolet exposure, winter damp, and day-to-day swings that can deliver a genuinely hot afternoon and a cold, wet morning inside the same week. Rather than assert numbers, it’s worth knowing the sources: ARPANSA monitors ultraviolet radiation across Australian sites, and the Bureau of Meteorology publishes Melbourne climate statistics showing just how wide the seasonal and daily range runs. Both are worth a look if you’re specifying something that has to last outdoors for years.
UV is the slow killer. Water damages a sticker quickly and obviously; sunlight does it gradually, fading colour and embrittling the face stock until an edge lifts. Lamination is the usual countermeasure, and for outdoor work it’s less an upgrade than a requirement.
For a deeper comparison there’s vinyl versus paper stickers, a full guide to vinyl stickers covering durability in Australian conditions, and a focused piece on why vinyl suits outdoor branding alongside one on UV-resistant stickers for outdoor use.
Paper stock has a clear and legitimate place. Dry goods labels, price stickers, internal stock and inventory marking, high-volume roll labelling where the label’s working life is measured in weeks.
It prints beautifully, it takes pen well, and it’s the economical choice at volume.
Its limit is moisture, and the limit is hard. Paper on a bottle that goes into an ice bucket is a mistake you make once. If there is any chance of condensation, washing, refrigeration or outdoor exposure, it’s the wrong stock.
Clear vinyl produces an effect worth understanding: only the unprinted areas become transparent, so your design appears printed directly onto the glass or bottle rather than sitting on a visible patch.
It’s the right choice for glass jars, bottles, windows and anywhere you want minimal packaging presence. It performs best on smooth surfaces — textured glass reduces the effect noticeably.
One technical point that catches people out. On a dark or transparent surface, light colours and white simply vanish without a backing layer. White backup ink solves this by laying a solid white foundation beneath the colours so they stay visible and accurate regardless of what’s behind them. If your design includes white text, pale tones or a light logo, you need it.
The comparison between clear and white face stock covers when each makes sense, and there’s a product page for clear stickers with white ink.
Removable stickers use an adhesive engineered to release cleanly. Seasonal promotions, short-run campaigns, price stickers that change, product stickers a customer is meant to peel off — all removable jobs.
Static cling uses no adhesive at all. It holds through electrostatic attraction to smooth surfaces, which means it leaves nothing behind and can be reused repeatedly. For a leased shopfront where you’d rather not argue about residue, or a campaign you’ll run again next winter, it’s a practical answer.
Its limits are honest ones: it needs smooth glass, it’s not built for driving rain or high wind, and water temporarily reduces its grip until the surface dries.
Some surfaces reject standard adhesive. Textured plastics, powder-coated metal, raw timber, concrete, brick, crates and bins, and anything cold or slightly rough.
High tack stickers use a more aggressive adhesive built for exactly those conditions. The trade-off is removal — a high tack sticker is generally there for good, and getting it off cleanly can require heat or solvent. Specify it when permanence is the point.
This is the block most generic sticker guides skip, and it matters enormously in Victoria. Dairy, smallgoods, frozen meals, cold-pressed juice, chilled ready-meals — a large share of the state’s food production ends up in a fridge or freezer.
Here’s what people get wrong. A label applied at room temperature to a room-temperature container, then chilled, behaves very differently to a label applied directly onto a cold, damp surface. Standard adhesives need a moment and a reasonably dry surface to form a proper bond. Apply one to a container straight out of the cold room, with a fine film of condensation across it, and the adhesive never fully keys in.
The result shows up days later as a lifted corner, and it gets blamed on the sticker when the cause was the application condition.
Two practical habits fix most of it. Label before chilling wherever your process allows. And where you can’t, specify a material rated for cold application rather than assuming a standard stock will cope. The guide to freezer stickers covers this in detail and is worth reading before you order labels for any chilled product.
Rather than a spec sheet, here’s the short version of what each stock is actually for:
If sustainability factors into the decision, there’s a separate overview of eco-friendly sticker materials worth reading alongside this.
Material settled, the next question is a different kind entirely: what shape does it get cut into, and how is it supplied to you?
This is where most sticker orders stall. Not because the concepts are difficult, but because the vocabulary is inconsistent across the industry and nobody wants to admit they’re unsure what they’re ordering.
Here’s the whole vocabulary, plainly.
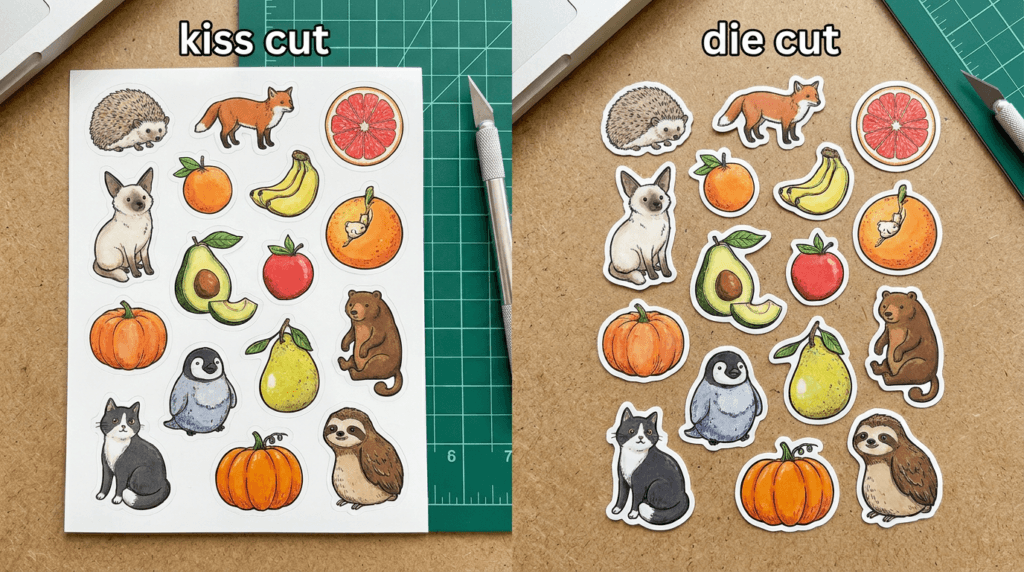
In common usage, kiss cut means the blade cuts through the printed face material and the adhesive layer but leaves the backing paper intact. You get a peelable sticker sitting on a larger square or rectangular backing sheet.
Die cut, in the same common usage, means the sticker is cut all the way through — backing included — so the finished item is the shape of your design.
Now the honest part. These terms are used loosely across the print industry, and some printers treat them as describing the same underlying process, with “kiss cutting” simply describing how the blade kisses the backing without severing it. Neither usage is wrong exactly, but the two are not interchangeable when you’re briefing a job.
So don’t assume. Describe the outcome you want in plain words — “peelable sticker on a square backing” or “cut to the shape of the logo, no border” — and you’ll get what you pictured regardless of which vocabulary your printer prefers.
There’s a full explainer on what kiss cut stickers are and how they’re produced, and a companion guide to die cut stickers.
Choose the kiss cut approach for sheets, giveaways, anything handed out in volume, and anything applied at speed. At a market stall on a cold morning, a sticker that peels off a flat backing in one motion is worth far more than an elegant contour cut.
Choose the die cut approach for hero logo stickers, window decals, contour shapes and premium unboxing moments. When the shape itself is the design, cutting to the outline is what makes it look considered rather than printed.
Worth knowing on shape work: very fine elements — thin text strokes, delicate spikes, anything very narrow — may need adjusting to cut cleanly and survive handling. A good printer will flag it before production rather than after. The die cut sticker options page covers what’s possible.
A sheet puts multiple designs on one backing. Variety packs, school and event use, sticker packs sold as a product, or simply giving a customer a choice rather than a single design.
For makers selling direct, sheets are often a product in their own right rather than a marketing item.
If you are labelling hundreds of jars, bottles or satchels a week, you should be looking at rolls rather than sheets. It isn’t a marginal difference — peeling individual labels off sheets at volume is slow, and the time cost compounds every single week.
Rolls feed from a dispenser, apply in one motion, and suit any repetitive labelling run.
The material split still applies. Vinyl sticker rolls handle moisture-prone applications — chilled bottles, anything washed or refrigerated. Paper sticker rolls suit dry goods and high-volume, cost-sensitive runs.
Finish changes both appearance and durability, and the three options serve genuinely different purposes:
Shiny gold and silver finishes exist for a narrow but real set of jobs: premium seals, limited runs, gift packaging, awards and anywhere a metallic finish signals that something is special. Used sparingly they work well. Used everywhere they lose the effect.
If you’re still weighing options, there’s a guide to choosing the right sticker type for your project.
One caution before moving on. Promotional stickers and product labels frequently get bundled into a single order because they’re both “stickers.” They shouldn’t be. A product label carries obligations a marketing sticker never will.
The distinction is simple to state and easy to underestimate.
A promotional sticker has one job: to be noticed. If it’s beautiful and slightly imperfect, nothing is at stake.
A product label has to be accurate, durable, legible and — for many product categories — carry specific mandatory information. If it’s beautiful and slightly wrong, you may be reprinting an entire production run, or worse.
Different jobs. Different specifications. Often different materials. For the underlying distinction there’s a short piece on stickers versus labels and when to use each.
Most Victorian product businesses end up ordering some combination of the following:
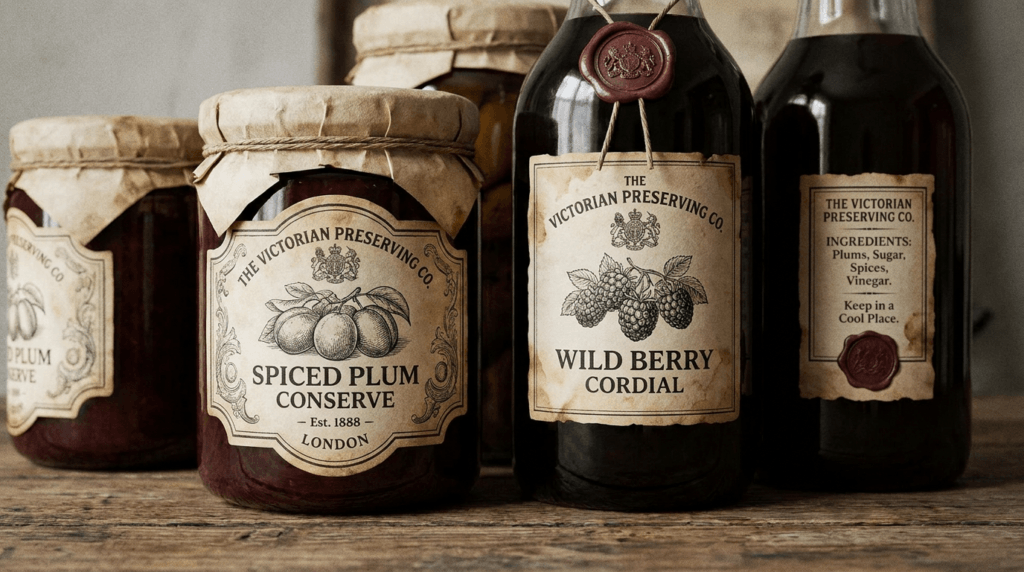
The front-of-pack label gets all the design attention. The back-of-pack panel is where the problems happen, because it carries the information that has to be right.
This needs stating carefully, because getting it wrong is expensive and this guide is not the authority on it.
Packaged food sold in Australia is subject to requirements set out in the Australia New Zealand Food Standards Code, administered by Food Standards Australia New Zealand. Those requirements cover categories including the statement of ingredients, allergen declarations, date marking, nutrition information and various warning and advisory statements.
The specifics — what must appear, how it must be presented, which exemptions apply to which businesses — are set out by the regulator, and they change. Rather than paraphrase any of it, the right move is to go to the source: FSANZ publishes labelling guidance for food businesses, separate and more detailed allergen labelling guidance, and the Food Standards Code legislation itself for anyone who needs the actual text.
Country-of-origin labelling is a separate matter under a separate regulator, which is a common point of confusion. It sits with the Australian Competition and Consumer Commission under the Country of Origin Food Labelling Information Standard, not within the Food Standards Code. The ACCC publishes guidance on country of origin food labelling covering when it applies and what the standard marks look like.
The practical advice is short. Confirm your label content against the regulators, or with a labelling consultant, before you send artwork to print. A printer reproduces what you supply — the accuracy of the content is yours to verify. Getting this sequence right is the difference between one print run and two.
Product labels endure conditions that promotional stickers never encounter.
Fridge and freezer transfer, covered earlier, is the most common failure point. Condensation on a cold bottle is the usual culprit when a label lifts at the corner a week after application.
Commercial kitchens add oil and steam. Delis and market stalls add constant hand-handling, which abrades an unlaminated label surprisingly fast. Refillable and returnable packaging adds washing — if your jars come back to be refilled, the label needs to either survive that or come off completely and cleanly.
Each of those is a material conversation worth having before the order, not after the first complaint. The complete guide to food label stickers goes further into practical food labelling.
Small-format labels are their own discipline. Limited surface area, curved containers, and often a legal or customary requirement to list ingredients in full on a space that barely fits the brand name.
Curved surfaces are the technical challenge. A label that sits flat on a sample sheet can wrinkle across a tightly curved jar, and the tighter the radius the more the material choice matters.
The layout decision is wrap-around versus front-and-back. Wrap-around treats the container as a single canvas and handles ingredient lists more gracefully. Front-and-back keeps branding clean and separates the information panel. Candles have their own considerations around heat and safety information — the guide to candle labels covers them.
For ongoing production, rolls almost always win. Consistent application, faster labelling, easy reordering of the same specification.
Sheets suit small batches, variable runs, seasonal products and businesses still testing a product line before committing to volume. There’s a companion guide on custom product labels and packaging stickers covering formats and reorders in more depth.
Run through this before you approve anything:
With the content settled, the file itself becomes the deciding factor. This is where most reprints actually begin.
Almost every disappointing sticker order traces back to the file, not the press. The printing was accurate — it accurately reproduced a file that wasn’t ready.
This section is the one to bookmark.
The working standard is 300 DPI at final print size. Both halves of that matter. An image can be 300 DPI at postage-stamp size and fall apart when enlarged to a 200mm decal.
The most common source of trouble is a logo pulled from a website or a social media profile. Those files are deliberately compressed for fast loading — often 72 DPI, sometimes smaller. On a screen they look perfect. Printed at four times the size, edges go soft and text develops a fuzzy halo.
“It looks fine on my screen” is, genuinely, the single most frequent cause of a print that disappoints. A screen is backlit, low-resolution and forgiving. Paper and vinyl are none of those things.
Vector artwork is built from mathematical paths. AI, EPS, PDF and SVG files. It scales to any size — business card to building wrap — with no loss of quality. It’s ideal for logos, text and cut outlines.
Raster artwork is built from pixels. JPG, PNG and PSD files. It’s fixed to its pixel dimensions, and enlarging it means inventing detail that was never captured.
Photographs are necessarily raster. Logos should not be. If a designer created your logo, vector files exist — and you own them. Ask for them and store them somewhere permanent. It will save you money and frustration for as long as the business runs.

Screens emit light and build colour in RGB. Printing lays down ink and builds colour in CMYK. The two don’t map perfectly onto each other.
The practical consequence: certain colours that glow on a monitor — intense blues, hot pinks, fluorescent greens — cannot be reproduced exactly in standard process printing. They’ll print close, but shifted.
If a specific brand colour is critical, raise it explicitly when you order rather than assuming it will carry through. Supply the reference, flag it as brand-critical, and ask how it will be handled. Raising it before production is a two-minute conversation. Raising it afterwards is a reprint.
Three related ideas that prevent most trimming problems:
Bleed means extending your background artwork past the intended cut line, so that if the cut lands a fraction off, there’s still artwork there instead of a white sliver.
Safe zone means keeping text, logos and anything important comfortably inside the edge, so a slight cutting variation never clips them.
Cutting tolerance is the honest acknowledgement that no cutting process is perfect to the micron. Every printer has a small tolerance. Designing with that in mind is what separates a file that prints reliably from one that occasionally doesn’t.
Specifications vary between printers and between products, so confirm the exact bleed and safe-zone measurements for your specific job when you order rather than assuming a universal figure. There’s a full artwork and print quality guide covering file preparation in depth, plus design tips for custom stickers on layout and spacing.
For shape-cut work, supply a PNG with a genuinely transparent background — not a white rectangle that looks transparent on a white page. They are different files, and only one of them cuts correctly.
If your shape isn’t self-evident from the artwork, specify the cut path. Vector formats are preferable here because they provide clean paths directly. Where no vector exists, a cutting path can usually be built from a high-resolution JPG or PNG.
Convert text to outlines before supplying your file, or include the font files.
If you skip this and the printer doesn’t have your typeface installed, the software substitutes another one. Sometimes that’s obvious. Sometimes it’s a subtle change in a single glyph that nobody notices until the box arrives.
Run this before you send anything:
That last one is not a joke. Designers miss typos in their own work at a remarkable rate, and a misspelt street address on two thousand labels is a costly lesson.
If your artwork isn’t print-ready, that’s a normal situation rather than a problem. Fast Stickers offers a free design service.
First-time buyers may find the walkthrough on getting started with a custom sticker order useful.
The principle is straightforward and worth understanding before you request a quote.
Every print job carries a fixed amount of setup work — file preparation, press setup, cutting configuration, quality checks. That work is essentially the same whether you’re producing fifty stickers or five thousand. As the run gets longer, those fixed costs spread across more units, and the cost per sticker falls.
Which is why the per-unit figure drops as quantity rises, often sharply at first.
Now the counterweight, because the discount is not the whole picture. Ordering a very large run is a false economy if:
The better approach is to order to a realistic usage horizon rather than to the biggest available discount. Estimate honestly how many you’ll genuinely use in six to twelve months, then order to that. Stickers stored in a cupboard are money sitting still, and stickers with an outdated address are simply waste.
When you’re ready to price a specific job, you can request a quote with your quantity and specification, and see how the numbers move across different run lengths before committing.
With the file sorted, one variable remains: who prints it, and how quickly it reaches you.
Two printers can quote the same turnaround and deliver a fortnight apart. The difference is almost always in what the number was actually measuring.
Production time is how long the job takes to make. Shipping time is how long it takes to reach you afterwards. They are separate numbers, and they are frequently quoted as one — which is how a “three day turnaround” becomes a delivery that lands eleven days later.
Always ask for both, separately, in writing.
For clarity on this side: Fast Stickers produces most orders within 2–3 business days, and includes free express shipping Australia-wide. Production and freight, stated as two things rather than one.
If your deadline is genuinely tight, rush sticker orders are handled separately and worth asking about early rather than late.
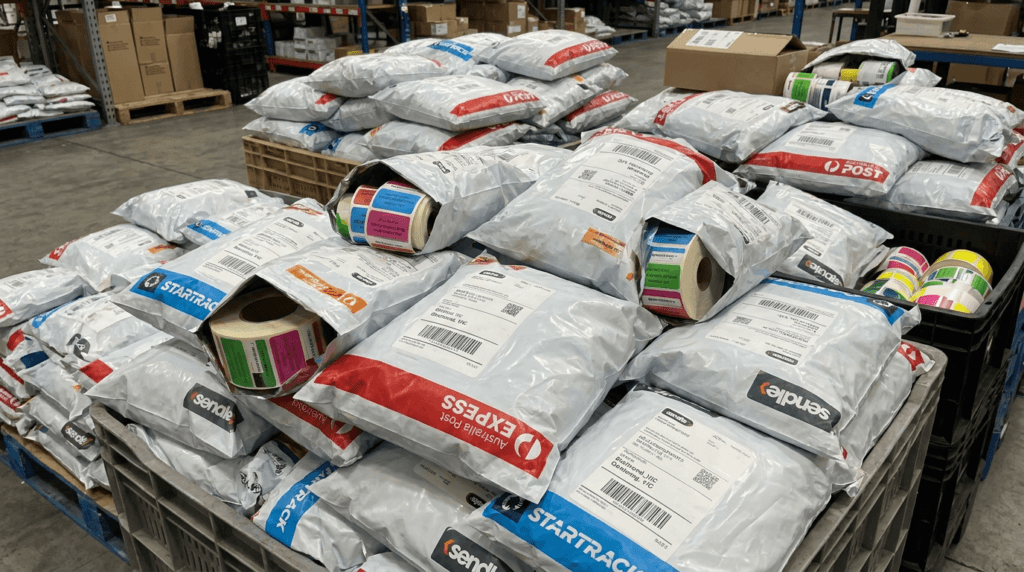
There’s a reasonable instinct behind typing sticker printing near me into a search bar, and it isn’t sentimentality about shopping local.
Domestic production and domestic dispatch mean a shorter, more predictable transit. There’s no customs step, no international freight variability, and no gap between “dispatched” and “actually moving” that can quietly absorb a week. When something ships from overseas, the tracking often goes quiet for days at a time, and there is very little anyone can do about it.
For a business with a market on Saturday or a product launch on the fifteenth, predictability is worth more than almost anything else.
Something changes when you can describe a job to someone who will see the file.
You mention the labels are going on chilled juice bottles, and they suggest a different material than you’d selected. You send through a 40mm design and they point out the text will be barely legible at that size. You describe the surface as “sort of rough powder-coated” and they recommend high tack before you’ve bought two thousand of the wrong thing.
None of that happens through a web form with a dropdown menu. It happens in a conversation, and it’s most of what a local supplier is genuinely worth.
The advantage of a local printer isn’t only speed. It’s that there’s someone to call.
Occasionally a job isn’t right. Reputable printers have a stated process for that, and it’s worth reading it before you order rather than after.
The detail is set out on the returns and refunds page, which is worth reading in full rather than taking second-hand.
The broader point is structural rather than promotional. Resolving a problem with a business in your own state — same time zone, same consumer law, an actual phone number — is a fundamentally different experience to lodging a dispute through an offshore marketplace portal and waiting.
Melbourne isn’t one market, and the sticker needs vary considerably by pocket.
The inner north — Fitzroy, Brunswick, Collingwood — runs on makers, roasters, small-batch producers and independent retail. High design sensitivity, smaller runs, frequent artwork changes.
The west, through Werribee and Braybrook, skews toward trades, light industrial, logistics and food manufacturing. Asset tags, compliance labels, fleet decals, volume roll labelling.
The east, through Doncaster, brings retail, professional services and hospitality. The south-east corridor out through Pakenham mixes growth-corridor retail with trades and food production.
Regional businesses have historically worn a freight penalty. Longer quoted delivery, higher shipping costs, or both — simply for operating outside a metro postcode.
That penalty is avoidable. Free express shipping applies across the country, which means a business in Geelong, Ballarat, Bendigo, the Latrobe Valley or Warragul isn’t paying more for the same order than a business in Carlton.
For regional producers — and Victoria has a great many, particularly in food and drink — that’s a straightforward removal of an unnecessary cost.
The work happens in Gippsland. That’s not a marketing position, it’s just where the business is, and it has one practical consequence worth noting: Victorian orders travel a short domestic distance from a Victorian facility.
For a Melbourne business, that means freight measured in a day or two rather than in international transit stages. There’s more on printing capability from Gippsland for anyone curious about how the local operation works.
All of which is a case worth testing rather than accepting. Here’s how to test it — on any printer, including this one.
The best protection against a disappointing order is a small number of specific questions asked before you pay. Any capable supplier will answer all of these without hesitation. Hesitation is itself the answer.
One more thing worth doing, especially for a first order or an unfamiliar material: ask for samples. Reading that a matte laminate “handles fingerprints well” is not the same as holding it. Opacity, thickness, finish and how a clear sticker behaves on your actual container are all things you understand in seconds by touch and never quite grasp from a description. For anyone comparing options for stickers Melbourne-wide, it’s the fastest way to resolve a decision you’ve been circling for a week.
Cost depends on five variables: size, material, finish, cut type and quantity. A small paper sticker on a roll and a large laminated die cut vinyl decal sit at very different price points. Quantity has the biggest effect, because fixed setup costs spread across the run. The practical step is to request a quote with your specification.
Most orders are produced within 2–3 business days, with free express shipping Australia-wide. Production time and shipping time are separate, so ask any printer for both numbers rather than a single combined figure. If your deadline is tight, mention it when you enquire rather than after ordering.
In common usage, a kiss cut leaves the backing intact so the sticker peels off a square or rectangular sheet, while a die cut trims all the way through to the shape of your design. Terminology varies between printers, so describe the outcome you want in plain words to avoid confusion.
Vinyl with a laminate is the reliable choice for outdoor use. Vinyl is waterproof and fade-resistant, and the laminate adds a protective layer against ultraviolet exposure, moisture and scuffing. Melbourne’s mix of strong summer UV and wet winters makes that protective layer genuinely worthwhile rather than optional.
Yes. Food labels can be printed on materials suited to refrigeration, moisture and handling. Label content is your responsibility to verify — requirements for ingredients, allergens, date marking and nutrition information sit under the Food Standards Code, and FSANZ publishes labelling guidance for businesses. Confirm content before printing.
Yes, including Geelong, Ballarat, Bendigo, the Latrobe Valley and Gippsland, with free express shipping. Regional Victorian businesses pay no freight premium compared with metropolitan Melbourne orders. Printing happens in Gippsland, so Victorian deliveries travel a relatively short domestic distance.
Vector formats are preferred — AI, EPS or PDF — because they scale cleanly and provide clear cutting paths. High-resolution raster files such as PNG and JPG are accepted, ideally at 300 DPI at final print size. For shape-cut work, supply a genuine transparent background rather than a white rectangle.
There are further answers on the Fast Stickers FAQ page, or you can browse the sticker shop if you already know what you need.
For anyone implementing this page, the FAQ schema below matches the answers above.
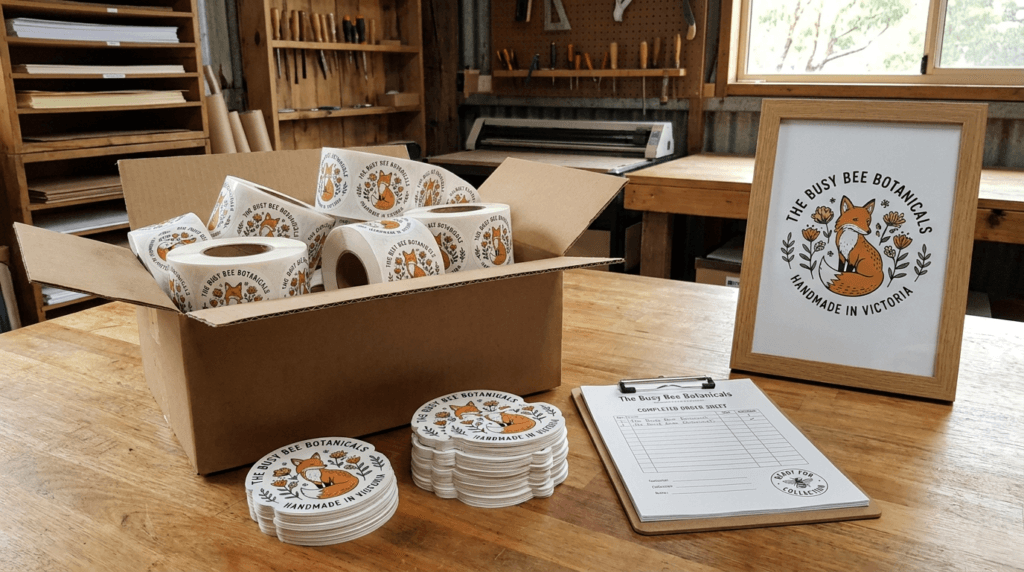
Back to the Brunswick café on a Thursday afternoon.
She’d open the order form now and work through it without pausing. The window decal is laminated vinyl, because it faces north and will cop a full summer. The cup labels are paper on a roll, because they’re indoor, short-life and she’s applying a few hundred a week. The loyalty card stickers peel off a backing sheet, because at a market stall on a cold Saturday morning nobody has time to pick at edges.
Three jobs. Three specifications. Fifteen minutes, not three evenings of comparison tabs.
That’s the whole sequence, and it always runs in the same order. Work out where the sticker will live and what it will face. Choose the material that suits those conditions. Decide the cut and the supply format based on how it gets applied. Add the finish that protects it. Prepare the file properly. Order to a realistic usage horizon rather than to the largest discount. Then choose a supplier you can actually reach.
None of it is complicated once the sequence is clear. It only looks complicated when all seven decisions arrive at once, in a checkout, with a deadline attached.
The local part of the equation is simple to state plainly. Production happens in Gippsland, Victoria, in 2–3 business days for most orders, with free express shipping across the state and the country. No freight penalty for a regional postcode. Someone reachable when a question comes up. For a Victorian business weighing up custom stickers Melbourne suppliers can deliver, that combination of short domestic transit and a genuine conversation tends to matter more than anything on a specification sheet.
Here’s the thought worth leaving with. A sticker is one of the few things a business buys that does its work silently, for months or years, without anyone thinking about it again. Which is exactly why it repays ten minutes of attention at the point of ordering — the cheapest moment to get it right, and the last one.
If you want to go deeper on a specific material or industry, the Fast Stickers blog has dedicated guides for most of the verticals covered here.
If you know what you need, request a quote with your artwork or a plain description of the job — size, quantity, where it’s going. If you’re not sure yet, get in touch with the team and describe the application. Send through a photo of the surface if that’s easier.
Artwork not print-ready? A free design service is available.
Or if you already know exactly what you want, browse the sticker shop and order directly.
Picture this: it’s 9pm on a Tuesday in a spare room in Bendigo, and you’re sitting cross-legged on the floor because the table ran out
Picture this. It’s Friday night in a suburban Australian street — the kind where the smell of melted cheese and wood-fired dough drifts through open

The Complete Australian Guide for Beekeepers and Honey Producers Picture this: it’s a warm December morning in the Yarra Valley. The flow has been extraordinary

Picture this: it’s 6am on the Saturday before Mother’s Day, and a florist in Melbourne’s inner north is already three hours deep into the morning.

Picture this: it’s a Tuesday night in a sticky-floored pub somewhere in Fitzroy or Fortitude Valley. The lights are low, the monitors are buzzing, and